Easy Apple Jelly Recipe Made with Juice
Canning truly is for everyone, especially if you’re just getting started. This easy Apple Jelly recipe uses powdered pectin and apple juice, so you don’t even need fresh apples to make it! It’s a fantastic beginner-friendly recipe that shows just how simple and rewarding home canning can be.
There’s something magical about pulling a jar of homemade jelly off the shelf in the middle of winter—a delicious reminder of summer’s bounty and your hard work.
If you’re looking to try more jelly and jam recipes, be sure to explore our Jams and Jellies page for plenty of tasty, approachable ideas to get you started.
This post contains affiliate links. This will not cost you anything but will help us offset the cost of running the blog. We only share products we use and would recommend to a friend. Thank you for your support! Click ‘HERE’ for more info.
Quick Summary Steps
- Step 1: Wash jars and lids.
- Step 2: Boil apple juice, pectin, and butter.
- Step 3: Stir in sugar; boil 1 minute.
- Step 4: Ladle into jars, leaving ¼” headspace.
- Step 5: Process in a water bath canner for 10 minutes.
- Step 6: Cool 12–24 hours and check seals.
Ingredients and Tools to Help You!
Jelly is such a simple thing to make and can. You only need a few ingredients and a few simple tools to get started!
- Apple Juice– You can make apple jelly with apple juice, or you can juice your own apples. Either way will get you some delicious jelly! I got some organic apple juice because it was so much easier than trying to make my own apple juice.
- Sugar– I use organic, raw sugar when possible
- Sure Jell Powdered Pectin– You can make jams and jellies without pectin, but it is a longer process and there is a little more work involved. I often opt to use powdered pectin because it takes the guesswork out of making jams and jellies! This is one of the brands I use often.
- Butter- This helps jams and jellies not foam on the top as much! It just takes a little.
- Half-pint Jars– I don’t usually buy these from Amazon because they are a lot more expensive, so look for them at Walmart, Farm and Fleet, Menards, etc.
- Lids and Rings for jars- You should use new lids every time you can something new to ensure you get a proper seal.
- Canning Tools: These tools make canning so much easier
- Waterbath Canner– Mine is similar to this one! There are also bundles where you can get your canner and the tools together and save a little bit.
Why Use Apple Juice Instead of Fresh Apples?
Using apple juice makes this recipe incredibly simple and beginner-friendly. Instead of spending extra time cooking down apples, straining out the pulp, and waiting for the juice to drip, you can start with ready-to-use juice and jump straight into jelly-making.
Store-bought juice also gives you consistent flavor and clarity, which can sometimes be harder to achieve with homemade juice (since different apple varieties have different sugar and pectin levels). Both work, but apple juice makes this one of the easiest jellies you’ll ever try!


Tips for Perfect Apple Jelly Every Time
Here are a few of my favorite tips to help you make the perfect jelly every time.
- Measure carefully – Jelly relies on the right balance of juice, sugar, and pectin to set properly. Too much or too little can affect the final texture.
- Bring to a full rolling boil – Make sure the mixture is boiling hard enough that it doesn’t stop when stirred. This ensures the pectin activates and your jelly sets.
- Don’t skip the butter – A tiny bit of butter keeps the foam down, giving you a clearer jelly without a thick layer of bubbles to skim off.
- Work quickly – Once it’s done boiling, move fast to ladle the jelly into jars while it’s still hot and liquid. Waiting too long can cause it to start gelling in the pot.
- Avoid doubling the batch – Jelly sets best in small batches. If you want more, make two back-to-back batches instead of trying to cook it all at once.
How to Store and Use Homemade Apple Jelly
Properly sealed jars of apple jelly can be stored in a cool, dark place for 12–18 months. Once opened, refrigerate and enjoy within 3 weeks.
Apple jelly isn’t just for toast; it’s a versatile pantry staple! Try spreading it on biscuits, stirring a spoonful into oatmeal or yogurt, glazing pork or chicken, or even using it as a filling for thumbprint cookies. It’s a little jar of sweetness you’ll find yourself reaching for again and again.
How to Make Apple Jelly
Wash and sanitize 6 half-pint jars and lids by boiling them in a pot of water for 10 minutes. If you are water bath canning your jars for 10 minutes or longer, you don’t have to sanitize them. Since we only need to process the apple jelly for 5 minutes, sanitize the jars before beginning.
Pour the juice into a sauce pot. Add pectin and butter to the juice and stir. Bring the mixture to a rolling boil over medium-high heat. Stir constantly to avoid burning. Add sugar and bring back to a rolling boil. Boil for 1 minute, stirring constantly. Remove from heat. Skim off foam if necessary.
Using a funnel, ladle the jelly into sanitized jars, leaving 1/4 inch headspace. Wipe the rims with a clean cloth and put the lids on. Tighten to fingertip tight. Put the jars in the canner and lower the rack. The water should cover the jars by about 2 inches. Add water if needed. Put the top on the canner and bring the water to a boil. Once it is boiling, process the jars for 5 minutes.
When the timer goes off, turn the heat off and let them sit for 5 minutes. Remove the lid and remove the jars using a jar lifter. Let it sit for 12-24 hours and then check for proper seals. Store in a cool, dry place with the rings off.
More Apple Recipes
I love apple recipes, with and without using actual apples. Check out these other apple and apple cider recipes to try:
- Homemade Apple Pie Spice – A warm, fragrant blend that instantly makes any recipe taste like fall.
- Applesauce – Smooth, naturally sweet, and perfect for snacking or baking.
- Apple Butter – Rich, spiced, and spreadable—like autumn in a jar.
- Apple Cider Donut Bread – A cozy, cinnamon-sugar loaf with all the flavor of orchard-fresh donuts.
FAQs about Apple Jelly Made From Juice
Not with this exact recipe, it relies on the sugar-to-pectin ratio to set properly. If you want a lower sugar version, use a low-sugar pectin instead.
Cloudiness usually comes from shaking the juice, not skimming the foam, or overcooking. It’s still safe to eat, just not as clear.
It’s better not to. Jelly sets best when made in small batches, so make two back-to-back batches instead of doubling.
Properly sealed jars last about 12–18 months on the shelf. Opened jars should be refrigerated and used within 3 weeks.
Ready to Make your Own Jelly?
Making your own apple jelly is a simple way to bring a taste of orchard sweetness into your pantry. Once you try it, you’ll see how quick and satisfying homemade jelly can be! If you enjoyed this recipe, don’t forget to check out my Water Bath Canning Guide for more easy, beginner-friendly recipes you can home can.

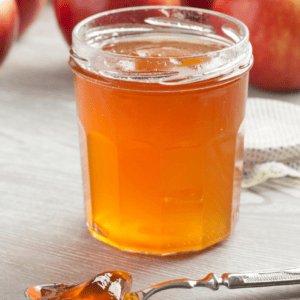
Apple Jelly with Apple Juice
Equipment
- water bath canner
- half-pint jars and lids
- Canning Tools optional
Ingredients
- 4 cups apple juice organic
- 1 1.75oz box sure jell pectin
- 5 cups sugar raw, organic
- 1/2 tsp butter optional
Instructions
- Wash and sanitize 6 half-pint jars and lids by boiling them in a pot of water for 10 minutes.
- Pour the juice into a sauce pot. Add pectin and butter to the juice and stir. Bring the mixture to a rolling boil over medium-high heat. Stir constantly to avoid burning.
- Add sugar and bring back to a rolling boil. Boil for 1 minute, stirring constantly. Remove from heat. Skim off foam if necessary.
- Using a funnel, ladle the jelly into sanitized jars, leaving 1/4 inch headspace. Wipe the rims with a clean cloth and put the lids on. Tighten to fingertip tight.
- Put the jars in the canner and lower the rack. The water should cover the jars by about 2 inches. Add water if needed. Put the top on the canner and bring the water to a boil. Once it is boiling, process the jars for 5 minutes.
- When the timer goes off, turn the heat off and let sit for 5 minutes. Remove the lid and remove the jars using a jar lifter. Let sit for 12-24 hours and then check for proper seals. Store in a cool, dry place with the rings off.


5 Comments
Pingback:
Pingback:
Pingback:
Pat
I made this jelly recpie but was not clear, looked as it had bits os apple or foam in it I used a bottled 100% juice Did I over proces it? It was a little warm when I checked it. Thye juice was organic.
Samantha
Hi there! This has happened to me before with a jelly made from juice. Let’s see if we can figure out what happened to you.
1. Yes, you could have potentially processed for too long. This can cause the pectin to break down the texture of your jelly could be off. How long did you process your jelly for?
2. Did you pectin clump up when you added it to the juice? Sometimes this happens if you add it straight into the juice.
3. This is what happened to me: When I took my jelly off of the stove in the pot, I left it for a few minutes to get my jars ready. During that time my jelly started to set so when I ladled it into the jars it looked like there were some chunks in it that didn’t blend back in with the liquid. After I processed it in the water bath canner it still looked like there were chunks. I still ate it and it was fine.
Let me know what you think happened!