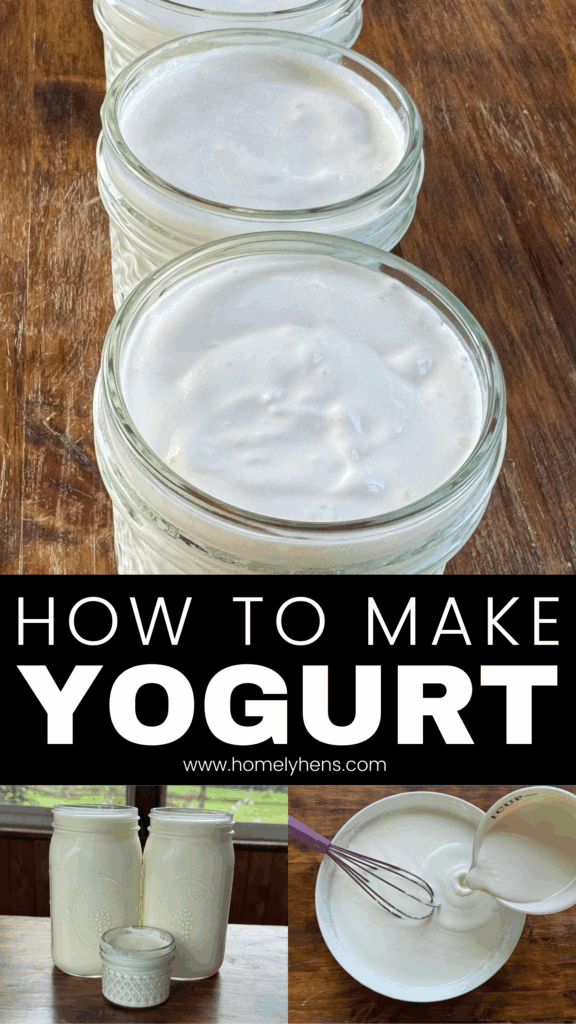
How to Make Yogurt at Home (With or Without an Instant Pot
Making yogurt at home is simpler than you might think—and it only takes two ingredients to get started.
Whether you’re using raw milk and the stove-top method, or store-bought whole milk and an Instant Pot, making homemade yogurt is a rewarding skill. It’s fresher, more customizable, and often more gut-friendly than the store-bought kind.
I started making yogurt as part of my journey toward more nourishing, homemade meals—and it’s becoming a weekly habit in our kitchen.
If you’re trying to ditch processed foods and embrace real ingredients, learning how to make your own yogurt is a great step. You’ll find even more inspiration for building a homemade pantry over on our Cooking from Scratch page.
This post contains affiliate links. This will not cost you anything but will help us offset the cost of running the blog. We only share products we use and would recommend to a friend. Thank you for your support! Click ‘HERE’ for more info.
Quick Summary (Step-by-Step Instructions)
- Step 1: Heat milk to 180°F for 10-20 minutes, then cool to 110°F.
- Step 2: Stir in a few tablespoons of plain yogurt as a starter.
- Step 3: Incubate:
- Instant Pot: Use the “Yogurt” function for 8–12 hours.
- Without Instant Pot: Use oven light, cooler, dehydrator, or warm spot.
- Step 4: Chill & strain (optional) yogurt in the fridge for 6+ hours.
Why Make Your Own Yogurt?
There are several benefits of making homemade yogurt. When you’re on a health journey and trying to avoid unnecessary ingredients and additives in your yogurts, making homemade is a great option.
While you can find plain yogurt made with only cultured milk at the store, homemade options are going to be less processed and have better gut benefits because there are more live cultures. If you’re using raw milk, you simply can’t get a better, more nutritious yogurt than that!
Making your own yogurt can help save money and reduce plastic waste. You can also control the flavor of your yogurt when you make it at home. The tangy flavor and gut benefits can be controlled by letting it ferment for less or more time.
What You’ll Need to Make Yogurt
Yogurt- Live Culture Starter
You’ll need a small amount of plain yogurt to use as a live culture starter. You can use homemade yogurt or whey from a previous batch (ideally less than a week old) or store-bought plain yogurt. Do not use flavored yogurt.
Instant Pot (optional)
An Instant Pot is optional, but it does have a yogurt setting to make the process a little easier. If you have one already, then it is great to use for this, and it eliminates the need to use anything else to heat for the fermentation time. Be careful, though, not all Instant Pots work properly for this.
Pot
If you’re not going to use an Instant Pot, you’ll need a pot to heat the milk on the stove. You can use a pot for their step, even if you’re using an Instant Pot for the fermentation heating time.
Gun Thermometer
A thermometer is necessary to maintain the correct temperature of your yogurt in all the steps. This gun thermometer is so convenient for this recipe and many others.
Glass Jars or Containers
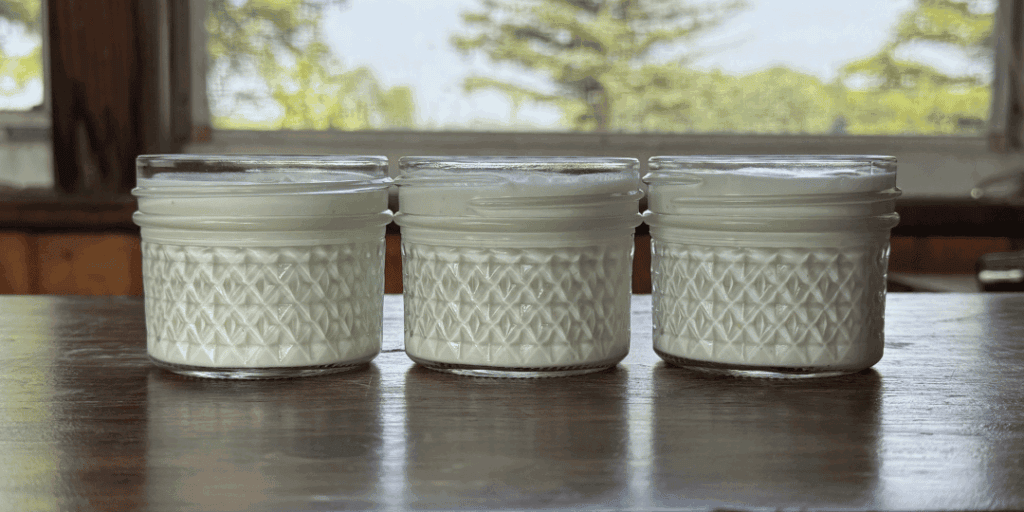
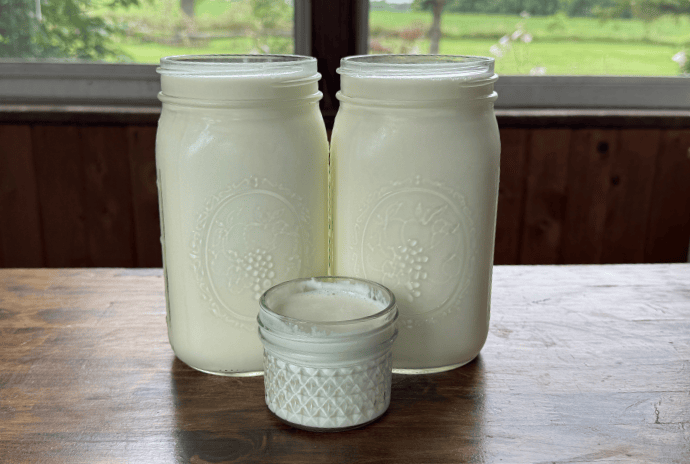
Keeping your food in glass jars or containers is convenient, nontoxic, and reduces waste. I love the little yogurt jars or a cute mason jar to keep my yogurt in. The 4-oz jars are the perfect serving size for kids.
What Type of Milk is Best to Make Homemade Yogurt
Milk Options
There are pros and cons to each type of milk. The bottom line is that you can use what you have: whole milk, 2%, store-bought, or raw. Whatever milk you drink can usually be made into yogurt.
Raw milk is not homogenized or pasteurized, so it has all of the health benefits that are naturally in milk, making home-made raw yogurt the most beneficial and potent, with all the naturally occurring enzymes and nutrients. You may get more inconsistent textures with raw milk.
Store-bought milk is easy to find wherever you are, unlike raw milk. Store-bought milk is pasteurized and homogenized (so it’s cooked at high temperatures to kill any potential harmful bacteria and will no longer naturally separate). There are fewer enzymes and good bacteria, but it is more consistent with texture, so your yogurt will be more consistent each time you make it.
Whole milk is best, in my opinion, because it is higher in good fats and nutrients. Yogurt made from whole milk will be thicker and creamier, too. You can use 2% milk to make yogurt. It will be thinner, but lower in calories and fat if that’s what you’re looking for.
Method 1: How to Make Yogurt in the Instant Pot
Pour your milk into the Instant Pot insert. Press the Yogurt button until it reads “Boil.” This heats the milk to around 180°F, which helps denature the proteins so your yogurt sets properly. It’ll take 25–45 minutes. Once the Instant Pot beeps, use a thermometer to check that it has reached at least 180°F. If it didn’t, run the boil cycle again.

Next, let the milk cool down to about 110°F. You can either remove the insert and set it on the counter to cool or put it in a cold water bath to speed things up. Stir occasionally so it cools evenly. If you want to speed up this step, you can heat the milk to 180ºF on the stove and then use the Instant Pot for the fermentation step.
In a small bowl, mix 1–2 tablespoons of plain yogurt (with live cultures) with a little bit of the milk. Then pour that back into the rest of the milk and gently stir to distribute the cultures. You can use yogurt from a store-bought container, your last batch, or even whey from your last batch of Greek yogurt.
Now, return the insert to the Instant Pot. Press the Yogurt button again and set the time anywhere from 6 to 12 hours, depending on how tangy and thick you like it:
- 4–6 hours: Mild, creamy
- 6–8 hours: Balanced flavor and texture
- 8–12 hours: Tangy, thick
Check the temperature once it gets going to make sure it reaches 110ºF. Some Instant Pots have a Yogurt feature, but only get to about 105ºF, and that will not work as well. Once the time is up, remove the insert, cover it, and place it in the fridge for at least 6 hours (or overnight).
If you want thicker Greek-style yogurt, strain it using cheesecloth or a yogurt strainer before refrigerating, or while it chills. Once chilled, stir it up and store in jars or airtight containers in the fridge for up to 2 weeks.
Warning About Instant Pot Yogurt Setting
Some models of Instant Pots have a yogurt setting, but they don’t always work properly. If your yogurt does not thicken, it is likely because the temperature in the yogurt setting was not right. You can open the lid and check the temperature periodically to make sure it is getting to the right temperature during both heating steps.
My Instant Pot gets to 105º for the fermentation step, and that isn’t the ideal temperature for the yogurt to turn out right. Unfortunately, I can’t use the Instant Pot and have to use a different method.
Method 2: How to Make Yogurt Without an Instant Pot
In a medium pot, heat the milk to 180°-185ºF. Getting the temperature to 180ºF helps denature the protein so it can set properly later. Check the temperature often; you don’t want the milk to boil because it can kill beneficial properties. Keep the milk at about 180º-185ºF for 10-20 minutes. Then, let it cool to 110ºF.
Mix 1-2 tablespoons of plain yogurt (with live cultures) from a previous batch or a plain store-bought variety with some of the milk, then stir it into the rest of the milk. This works to introduce the live cultures into your milk so that it can ferment. You can also use the whey from a previous batch of Greek yogurt.

Next, you’ll need to keep your yogurt between 110°F and 115°F during incubation. This is the ideal range for the live cultures to thrive and properly ferment the milk.
You can use an oven with the light on (but the heat off), a dehydrator that holds a steady temp, an insulated cooler with warm water, or any consistently warm spot in your home.
Maintaining this temperature range is crucial—if it drops too low (below 105°F), the cultures slow down or stop growing, and your yogurt may turn out thin or not ferment at all.
You can control the flavor and texture of the yogurt by shortening or lengthening the fermentation time.
- 4–6 hours: Mild, subtle tang, creamy
- 6–8 hours: Balanced flavor and texture
- 8–12 hours: Tangy, thick
The longer it cultures, the more lactose gets converted into lactic acid, which is what creates that tangy flavor. Ferment for 4 hours, and then stop the fermentation once you reach your ideal flavor.
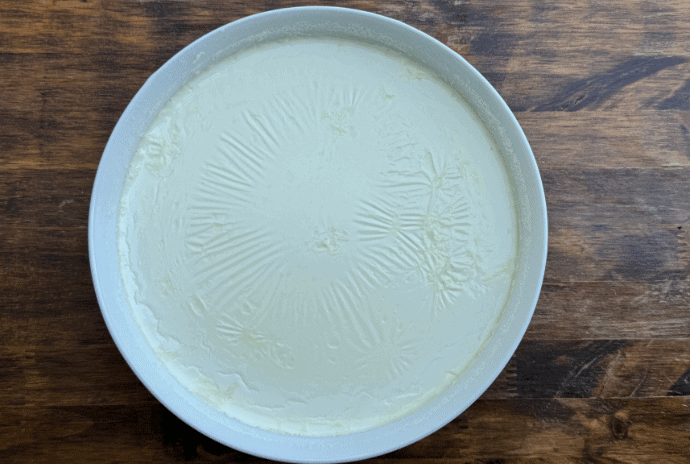
Chill in the fridge for 6+ hours (or overnight). You can strain the yogurt using a cheesecloth while refrigerating if you want Greek (thicker) yogurt.
Stir and store it in airtight glass containers or jars in the fridge for up to 2 weeks.
How to Make Greek Yogurt
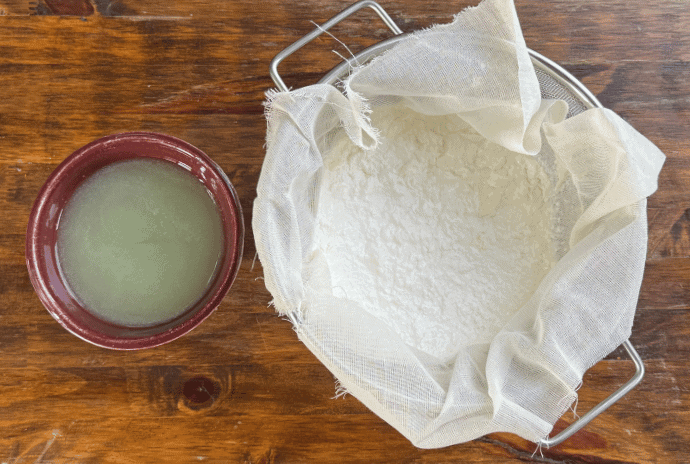
Making Greek yogurt is just one extra step in your process. You can make it by straining the whey out of your yogurt. Do this by pouring the yogurt into a cheesecloth and straining it into a bowl while you’re chilling it overnight.
In the morning, you’ll be left with a thick Greek yogurt and the strained whey that you can use in other recipes or as the starter for your next yogurt batch.
Pros and Cons of Making Greek Yogurt
Greek yogurt is thicker, which is ideal for some recipes, like dips and sauces. Some people prefer it thicker to eat, too! It is higher in protein by volume since it is more concentrated. It’s filling and better for muscle repair and keeping you feeling full, longer. Greek yogurt is lower in carbs and lactose, which makes it easier for some people to digest.
While Greek yogurt sounds amazing, there are a couple of downsides. If you strain your finished product, your overall yield will be less, so you’ll need to start with more milk to get the amount that you want to end up with. Some nutrients, like calcium and B vitamins, are in whey, so when you strain it out, you lose those.
How Long Does Homemade Yogurt Last?
Homemade yogurt typically lasts 1-2 weeks when stored in the refrigerator in a clean, airtight container. For the freshest flavor and texture, try to use it within the first week. If you’re saving a bit as a starter for your next batch, use it within 5 to 7 days for the most active cultures.
Storage Tips:
- Use clean glass jars or food-safe containers with tight-fitting lids.
- Store toward the back of the fridge, where the temperature stays most consistent.
- Don’t double-dip—use a clean spoon every time to prevent contamination.
Signs It’s Gone Bad:
- Sour or off smell that’s different from the usual tang.
- Visible mold or unusual separation.
- Slimy or ropey texture that feels off.
Common Problems + Tips for Success
Just like with anything new, it takes time to perfect techniques for yogurt making. I hope these common problems and solutions will help you troubleshoot any issues that might come up! Many textural issues can arise if the temperature during each stage isn’t optimal. It can still be eaten as long as it doesn’t smell or taste off.
Didn’t Set (Too Runny):
- The milk may not have reached 180°F during the heating phase.
- Starter culture may have been inactive or not enough was used.
- The temperature wasn’t kept between 110°F and 115°F consistently during fermentation.
- Incubation time may have been too short—try letting it culture longer next time.
Yogurt Is Grainy or Lumpy:
- This can happen if the milk was stirred too aggressively after adding the culture.
- Overheating can sometimes cause curdling—check that it didn’t go above 180–185°F for too long.
- Straining the finished yogurt can help smooth it out.
Yogurt Has Too Much Whey (Liquid on Top):
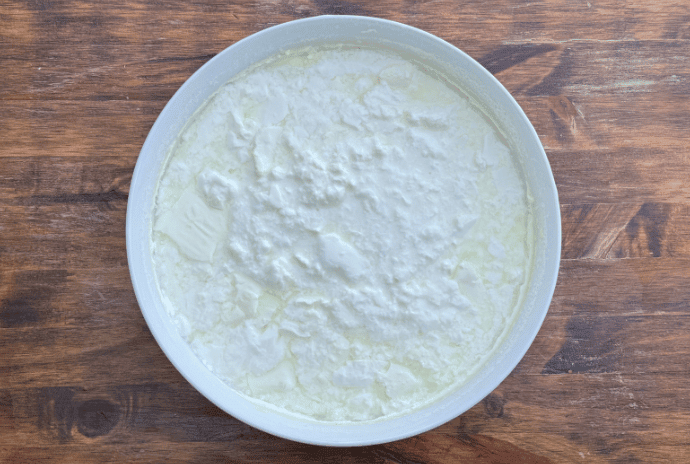
- This is normal! Just stir it back in or strain it out for thicker yogurt.
- If it seems excessive, the yogurt may have overcultured.
Smells or Tastes Bad:
- Always use clean utensils and containers to avoid contamination.
- It may be a result of using an old or weak starter culture.
Explore More Simple Staples
Keep your kitchen stocked with homemade basics that make everyday meals easier:
- Unsweetened Applesauce
- Apple Butter
- Low Sugar Grape Jelly
- Diced Tomatoes
- Pressure Canned Sweet Corn
- Beef Bone Broth
Want more real food recipes? Visit our Cooking from Scratch page.
Homemade Yogurt FAQ
Yes! You’ll end up with a delicious, super-nutritious, enzyme-rich yogurt.
No, always add sweeteners, fruit, or extracts after fermentation is complete and the yogurt has cooled. This keeps the cultures happy and active.
You can freeze yogurt for later use as a starter culture, but the texture may change if you plan to eat it as-is after thawing. For eating, it’s best enjoyed fresh.
Simply strain your finished yogurt through cheesecloth, a clean towel, or a yogurt strainer until it reaches your desired thickness. The longer you strain, the thicker it gets!
Homemade yogurt often has a richer, tangier aroma due to live active cultures and the lack of preservatives or stabilizers. As long as it smells fresh and slightly sour (not rotten), it’s likely just fine.
Yes, but it requires a lot of practice and some trial and error. Heat the milk until steaming but not boiling, and cool it until it’s warm to the touch—like a warm bath. A thermometer helps with accuracy, but it’s not essential.
How to Make Yogurt
Equipment
- Instant Pot optional
- Medium Pot
- Glass Containers
Ingredients
- 2 quarts whole milk raw or store-bought
- 2 tbsp yogurt from a previous batch or store-bought, whey from a previous batch will also work
Instructions
- Heat milk to 180°-185ºF for about 10 minutes, but do not let it boil (212ºF), then cool to about 110ºF.
- Mix 1-2 tablespoons of plain yogurt (from a previous batch or store-bought plain yogurt) with some of the milk, then stir it into the rest of the milk.
- Instant Pot: Use “Yogurt” function for 8–12 hours. Make sure the yogurt reaches and stays between 110º-115ºF. Some Instant Pots don't stay warm enough.
- Without Instant Pot: Use oven light, cooler with warm water, dehydrator, or warm spot. Ensure the yogurt stays between 110º-115ºF.
- Chill in the fridge for 6+ hours (or overnight). Strain the yogurt using a cheesecloth while refrigerating if you want Greek (thicker) yogurt.
- Stir and store in airtight glass containers or jars.


