


How to Make DIY Scrabble Tiles: Easy Step-by-Step Instructions
These DIY Scrabble Tiles are a HUGE HIT in my local area. My parents and I worked together to make hundreds of Scrabble tiles for families and friends in the last couple of years. I love seeing these personalized tiles as beautiful wall decor. They brought so many smiles to the people we made them for. Here’s exactly how we did it! If you have any questions about how we make them or anything that I haven’t mentioned please comment and ask!

This post contains affiliate links. This will not cost you anything but will help us offset the cost of running the blog. We only share products we use and would recommend to a friend. Thank you for your support! Click ‘HERE’ for more info.


What You’ll Need for your DIY Wall Decor:
- 1x4s – If you’re going to cut your own square tiles then we used 1x4s.
- Saw to cut your 1x4s
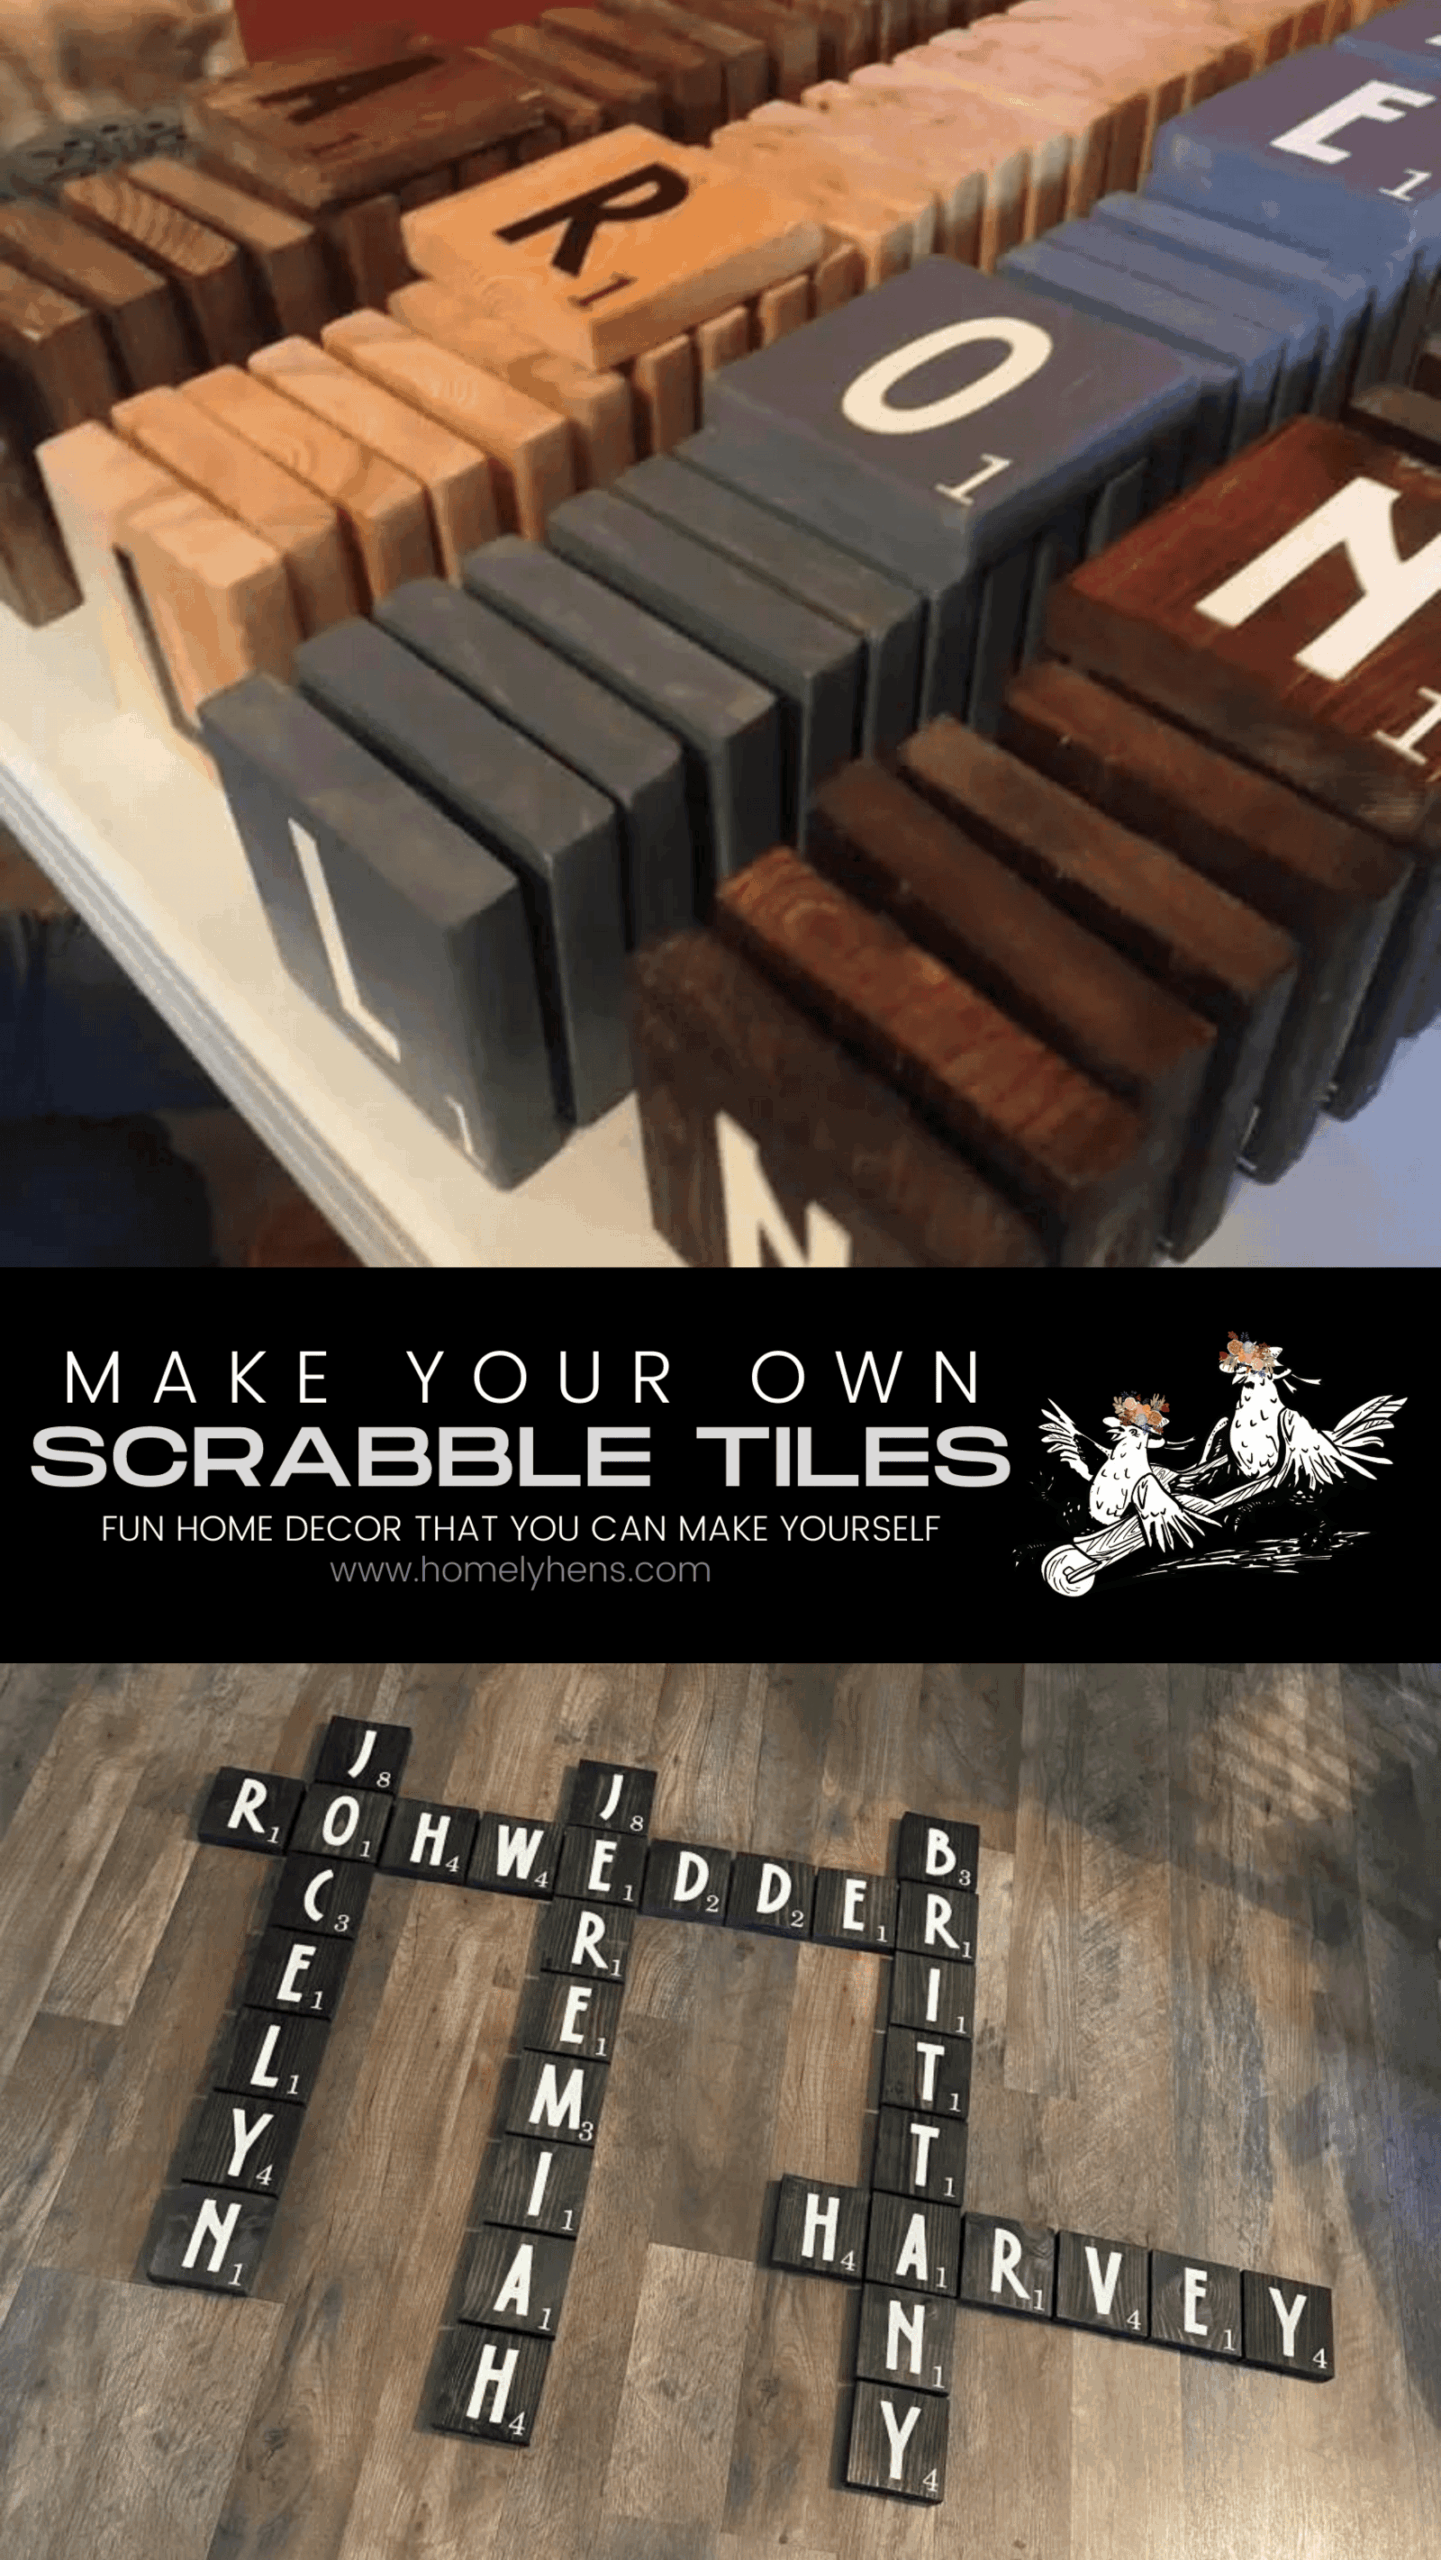
- Stain – We used three main colors of stain, provincial, pine, and ebony. To get the darker brown we applied the provincial stain thicker.
- Pre-done Wooden Squares – If you don’t want to make your own square tiles you can find ones that have already been done.
- ModPodge – I use the spray on ModPodge to do a light seal after staining and the paint on kind after I put the vinyl on.
- Crossword Puzzle Maker – you can use excel or a sheet of paper to figure out how your names will fit into a pattern on the wall but I love this free tool because it will give me multiple choices on how I can arrange the DIY Scrabble tiles.
- Cricut or other cutting machine – I use a Cricut to cut my lettings. You could use a stencil to paint your letters on or use stickers if you don’t have access to a cutting machine.
- Cricut Cutting Mat – I love the 12×24 mat
- Vinyl – I used Cricut permanent ivory and black vinyl
- Command Strips – I cut these command strips in half to hang the tiles.


How to Make Scrabble Tile Wall Decor for Your Home
Make Your DIY Scrabble Tiles Wall Layout
First things first, you need to figure out what names or words you’re going to use for your layout! There are a few ways to make your grid. You can be creative and write it out on a piece of paper to make your own unique grid layout OR you can use this fancy, free crossword puzzle maker and it will give you a few different options depending on the names/words you give it. Here’s the link for the crossword puzzle maker. I find that it is easier to do this part on my phone! You type in the names that you want to use, scroll down and click done. It will show you a sample grid. If you click rearrange, it will scramble them up. Here are some examples


Prepare or Buy the Square Tiles
Our tiles are 3.5 x 3.5 so we used 1x4s and cut them into 3.5 inches squares. You can also buy tiles on Amazon HERE if you don’t want to mess with cutting your own. Disclaimer: I totally cheat and my dad cuts and stains my tiles. We’re a team! Otherwise, I’d probably buy them. The ones I linked are only 3×3 so make sure you adjust accordingly if you use other sizes. The tiles can be whatever size you want. We found that the easiest way to stain the boards was before cutting the scrabble tiles! Then, after the tiles are cut, sand and stain the ends so everything is the same color and smooth. To give a light seal to the tiles, we sprayed them with Mod Podge on all sides.


Make the Letters for your Scrabble Tile Wall Layout
Now that you’ve got a layout picked out, write out the letters needed and open up whatever design software you use for your cutting machine. I use Cricut Design Space and my Cricut to cut the vinyl. You could also paint your letters freehand or use a stencil if you don’t have a cutting machine.
In Cricut Design Space I made my letters 2.5 inches tall using the font Opposites Attract. It’s not exactly a traditional scrabble font but I liked it! Use whatever font you like. For the numbers, I used Century Schoolbook at .75 inches. I LOVE my 12×24 mats for the vinyl so that I can stretch out the vinyl rolls and waste less space. In case you need a reminder, here are the number values for each letter:
- 1 point – A, E, I, O, U, L, N, S, T, R.
- 2 points – D, G.
- 3 points – B, C, M, P.
- 4 points – F, H, V, W, Y.
- 5 points – K.
- 8 points – J, X.
- 10 points – Q, Z.


Putting Everything Together for Your Scrabble Tiles
After you’ve cut out your numbers and letters, simply stick them to each tile. Lastly, we add another coat of Mod Podge to the tiles, this time brushing it on to make a nice thick layer to ensure the letters are sealed on! I recommend using command strips to hang the tiles. I use the medium command strips and I cut them in half. That way, you’re doubling your use of the strips and you’re not putting a bunch of holes in your walls trying to hang these babies up!


If you’re in a crafty mood and you need some new decor in your house, these diy scrabble tiles are definitely the way to go! Also, check out my post on the Beachy Wine Bottle Decor. Both of these projects make great gifts too! Let me know what you think of my tiles. My next scrabble tile project will be on my dad’s new CNC machine as soon as I can figure out how to work the programming! HAHA


You May Also Like

How to Dry Calendula Flowers 3 Different Ways

5 Essential Nontoxic Swaps for a More Nontoxic Home
