How to Make a Brooder for Chicks (With Tips for Meat Birds Too)
How to make a brooder for chicks is one of the first things every chicken keeper needs to learn—whether you’re raising future egg layers, backyard companions, or fast-growing meat birds. A well-designed brooder keeps your chicks warm, safe, and stress-free during those critical first weeks of life.
Setting up a brooder doesn’t have to be complicated or expensive, but there are a few key things to get right. In this post, I’ll walk you through the best brooder setup, including heat source tips, bedding, feeders, and how to adjust things as your chicks grow.
I’ve also added a section with special considerations for meat birds, since they grow faster and have slightly different needs. Take a look at our Homestead Animals page for more on chickens, ducks, and rabbits!
This post contains affiliate links. This will not cost you anything but will help us offset the cost of running the blog. We only share products we use and would recommend to a friend. Thank you for your support! Click ‘HERE’ for more info.
Quick Summary of How to Make a Brooder for Chicks
- Step 1: Choose a container and add pine shavings.
- Step 2: Install a heat source, feeder, and waterer.
- Step 3: Monitor temperature and clean the brooder daily.
- Step 4: Watch for signs of stress, pasty butt, or overcrowding.
What is a Brooder and Why Proper Brooder Setup Matters for Chicks
A brooder is a safe enclosure for chicks. It helps keep them safe from predators and warm. A brooder has everything the chicks need, including food, water, warmth, and safety.
Because chicks can’t control their body temperature until around 3-6 weeks of age, a brooder helps keep them out of drafts and under a heat lamp so they are always warm, avoiding hypothermia.
Essential Supplies for a Chick Brooder
There are a few essential supplies to make a safe chick brooder for your chickies. Once you have the basics, it is easy to get your brooder ready for chicks. If you plan on having chicks often, like yearly meat chicks, keeping the supplies for your brooder is easy. Just replace the shavings and get some fresh food and you’re good to go.
Brooder Container
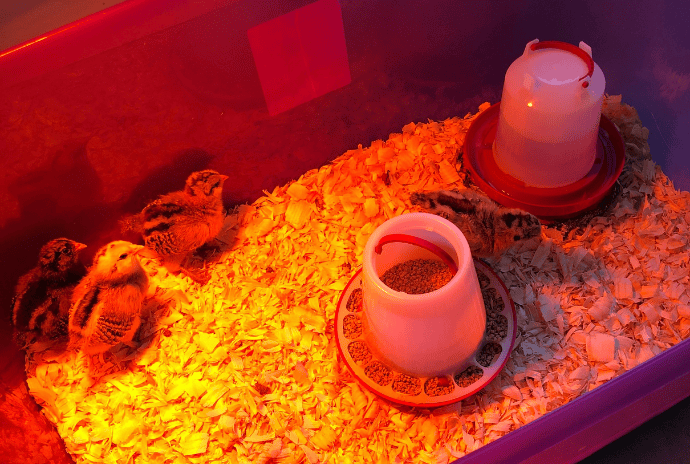
This is the enclosed space your chicks will live in for their first few weeks. It should be draft-free with good airflow. There are many different options for brooders, from plastic totes to DIY wooden boxes. Consider the number of chicks when you’re deciding what size brooder to get.
Also consider how long the chicks will be in the brooder and how fast they will grow. Meat chicks will grow faster than laying hens and will need a larger space when they start to grow. Plan for at least 1/2 square foot per chick in the first week, and increase space as they grow.
Options include:
- Plastic storage totes (18–50 gallons): hold 4–10 chicks for up to 2 weeks
- Large cardboard boxes: budget-friendly but not moisture-resistant
- Stock tanks: ideal for 10–25 chicks and easy to clean
- Puppy playpens or wire panels with draft guards: adjustable and long-lasting
- Old wooden crates or DIY wooden boxes: add lined plastic or absorbent layers for cleanup
Bedding
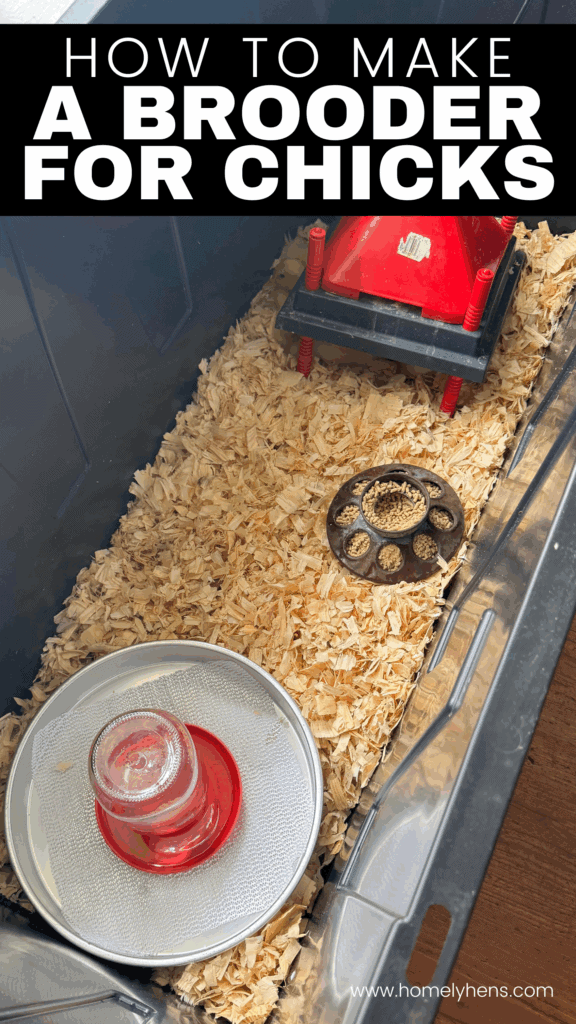
Use pine shavings for soft, absorbent bedding that controls odor and helps keep chicks dry. Avoid cedar because its oils can irritate chicks’ respiratory systems. Also avoid newspaper or cardboard because it can become slippery and cause injury to your chicks.
Heat Source
Chicks need a steady heat source of 90–95°F when they are newly hatched. Always monitor the temperature and chick behavior to adjust as needed to keep your chicks warm. You have two main options:
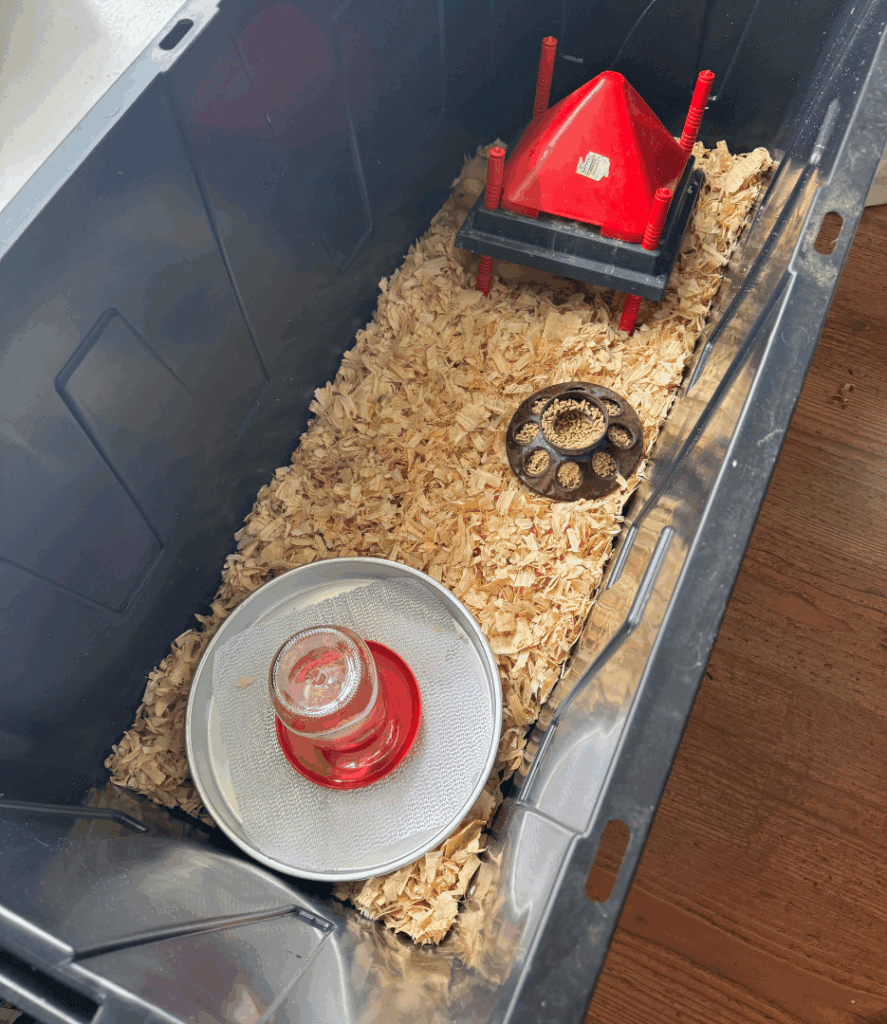
- Brooder heat plate: safer and more natural — chicks huddle under it like they would a mama hen. Make sure you get the size you need for the number of chicks you’ll have.
- Heat lamp with clamp and red bulb: common and budget-friendly, but must be used with extreme caution because it is a fire hazard. Heat lamps can also sometimes cause chicks to have pasty butt more often, so if you’re using this heat source, make sure you’re checking your chicks regularly.
Thermometer
Place a simple digital thermometer at chick level to ensure your heat zone is within the correct range. A temperature gradient lets chicks self-regulate by moving closer or farther from the heat.
Chick Feeder
Use a low-profile chick feeder to prevent tipping and spilling. Long trough-style or round gravity feeders both work well. The metal feeder will work without a jar when they are young, then you can attach a mason jar to hold more food. Make sure it’s easy for chicks to access, but not shallow enough for them to climb into.
I prefer to avoid plastic when I can, but it is sometimes difficult to know what you’re getting when you buy online. The metal trough-style feeders are sometimes really sharp. If you’re opting for metal, make sure your chicks are safe and the metal isn’t too sharp.
Chick Waterer
A gravity-fed chick waterer keeps clean water accessible without risking drowning. Add small stones or marbles in the base for the first few days if the chicks are very small. You can also elevate the waterer slightly to keep bedding out of it.
Draft Guard or Brooder Cover
If you’re using an open container, a wire mesh top or hardware cloth can keep chicks in and protect them from pets or curious toddlers, while still allowing ventilation. A cardboard “collar” around wire pens helps block cold air at ground level.
How to Make a Brooder for Chicks: Step-By-Step Guide
Choose a draft-free brooder container with good airflow. There are so many different options here for containers. A simple plastic bin that you have lying around, a homemade wooden box, or a big stock tank will all work. If you plan on having baby chicks often and give them plenty of room to grow in their brooder, you may want to go with a large container option.
Add 1–2 inches of pine shavings for soft, absorbent bedding. Install a heat lamp or brooder plate, aiming for 90–95°F the first week. Gradually decrease the temperature as the chicks grow (about 5º each week).
As mentioned above, the hot plate is going to be the safest option for your little chicks. While a heat lamp is your dad and grandpa’s go-to, it is also a fire hazard and gives uneven heat. The hot plate is a safer and more effective option.
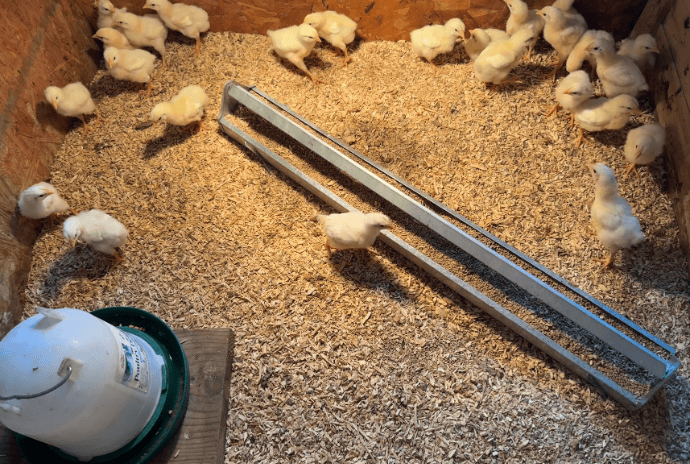
Place feeders and waterers in the brooder, away from the heat source. You want your feeder and waterer to be small enough that the chicks can’t step in them and get them dirty. Raising the waterer slightly will help keep the shavings dry underneath. You can raise the feeder and waterer slightly as the chicks grow.
Monitor the temperature and chicks’ behavior to ensure their health and safety. Clean the brooder daily so the chicks stay dry and warm. Watch for signs of stress, pasty butt, or overcrowding.
Increase the size of your brooder or move the chicks when they are getting too big for the area. Signs they might be outgrowing their space include trampling each other, uneven growth due to some not eating enough, and picking or pecking at each other. Here’s a spacing tule of thumb:
- 1 week old: 1/2 sq ft of space per chick
- 2-3 weeks old: 1 sq ft per chick
- 4+ weeks old: 1 1/2-2 sq ft per chick
How to Monitor Temperature and Chick Behavior
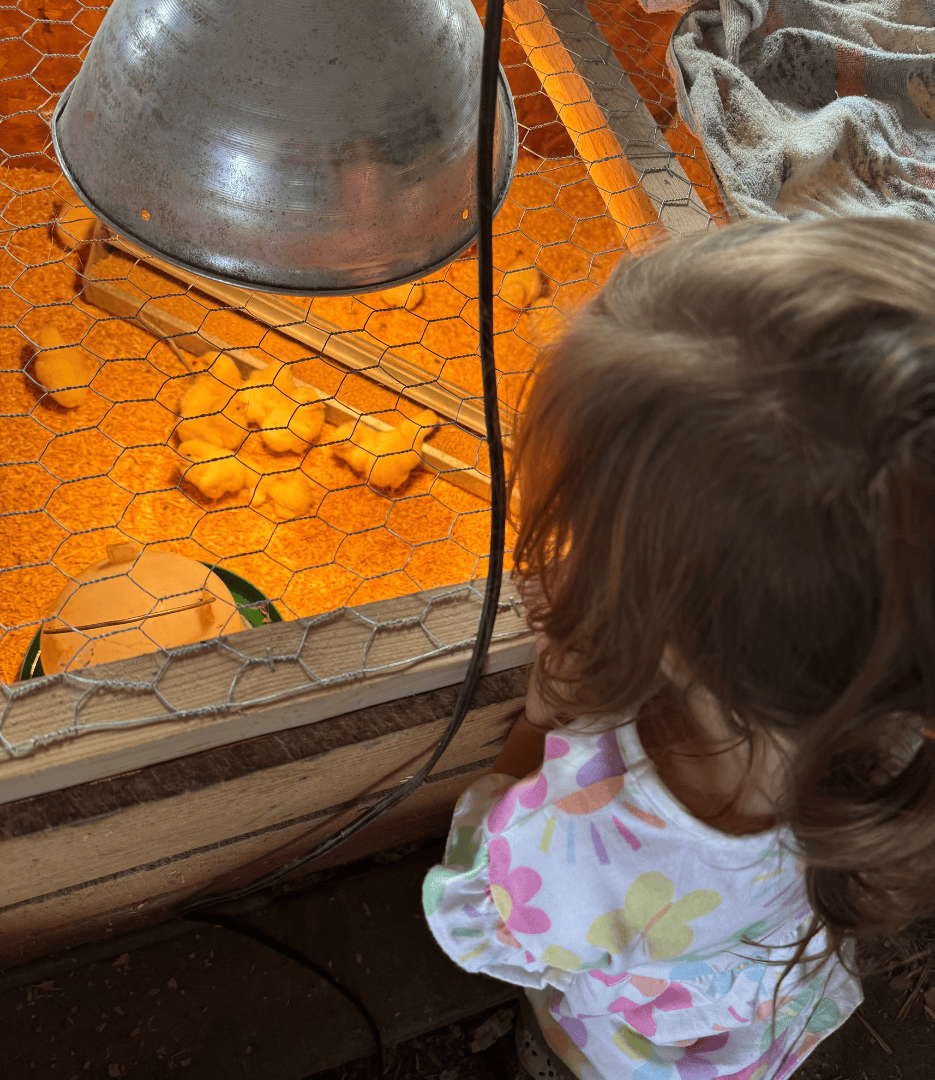
Chicks can’t regulate their body temperature until their feathers fully come in, so it is important to monitor the temperature of the brooder. Your brooder should be 90º-95ºF. You can monitor this with a simple thermometer to make sure it stays within the range. Decrease the temperature by about 5º each week.
Chick behavior will also give you signs that the brooder is too hot or too cold. If the chicks are all huddled together under your heat source, they may be too cold. If the chicks are all spread out, away from the heat lamp, or panting, the brooder is likely too hot.
You can adjust the temperature of a hot plate or heat lamp by adjusting the height, but always be cautious when using a heat lamp because it can be a fire hazard. Ensure your heat source is positioned at a safe distance from your chicks to prevent burns; they should be able to move freely underneath the heat source without touching it.
Signs that Chicks Need Attention
- Huddling tightly together under the heat source means they’re too cold. Increase the temperature or lower the heat source.
- Panting, spreading their wings, and avoiding the heat source means they’re too hot. Raise the heat source or widen the brooder.
- Lethargy, not eating, or drinking means they are generally stressed or ill. Check temperature, food, water, and crowding.
- Constant loud peeping means they’re uncomfortable. This may be a signal for temperature issues, hunger, thirst, or drafts.
- Pasty Butt: Sticky poop buildup on the chick’s vent area (under the tail) can block the vent and become fatal if not cleaned. Check chicks daily during the first week.
- Chicks trampling each other, picking feathers, uneven growth from some chicks not eating or drinking enough, or wet bedding from high traffic, mean the brooder is overcrowded.
Cleaning and Maintenance Tips for Brooder Setup
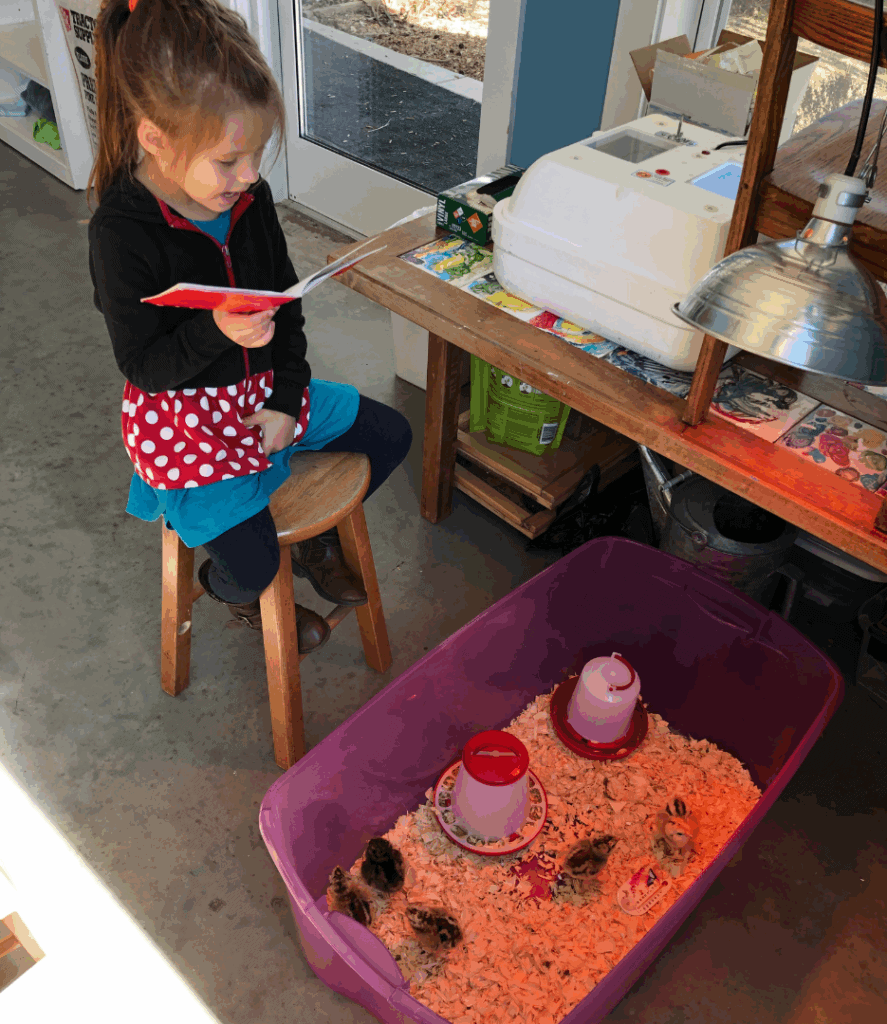
Keeping your brooder clean is essential to prevent illness, reduce odors, and give your chicks the healthiest start possible. A damp or dirty brooder can lead to respiratory issues, pasty butt, or even chick loss, especially in crowded setups.
Clean the brooder daily by removing any wet bedding in high-traffic areas or around the waterer. Completely replace all bedding once or twice a week, depending on how crowded the brooder is and how dirty it’s getting.
Watch out for drafts that might chill the brooder and then cause condensation inside. Keep the waterers slightly elevated to avoid water spilling into the shavings. Avoid overcrowding the brooder, as this will cause everything to get wet quickly. Ensure the chicks’ bellies and feet stay dry.
The bottom line is, you want to keep your brooder as clean and dry as possible so your chicks stay warm and healthy.
Special Considerations for Meat Chicks
If you’re raising meat chicks, there are some special considerations to keep in mind. Meat chicks, like Cornish Crosses, grow much quicker than other breeds, so you may want to start with a larger brooder or be ready to upgrade fairly quickly.
Because of their fast growth, adjust the feeder and waterer height often so they have easy access to their supply, without having to reach too far or strain their legs to get it.
Watch their growth. Meat chicks grow very quickly, but you don’t want to push them too hard. Don’t give high-protein feed too soon, and consider doing a 12 hours on, 12 hours off method of feeding if they are growing too quickly.
Reducing stress in meat chicks is similar to all other chicks. Ensure they have enough space, their temperature is just right, and their brooder stays dry. Check them often and make adjustments based on their needs.
Common Brooder Mistakes to Avoid
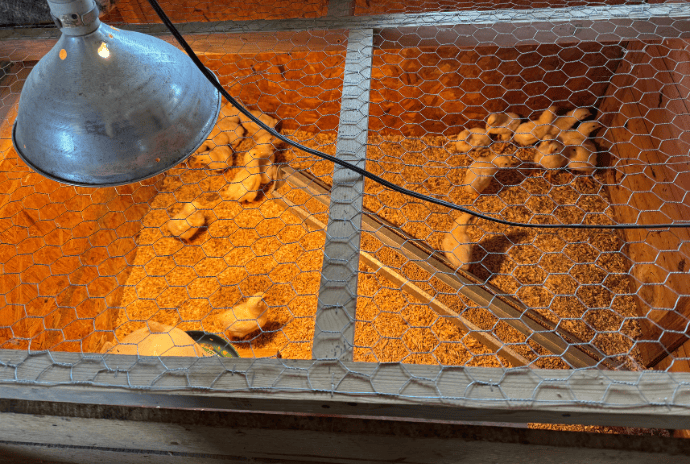
Even a simple brooder setup can go wrong if a few key details are overlooked. These are the most common mistakes that can stress chicks, slow growth, or even lead to early losses, and how to avoid them.
Using a Heat Lamp Without Safety Measures
Heat lamps are affordable but can be dangerous if not securely clamped. Always use a ceramic socket, double clamp, or tie it securely, and keep it away from flammable materials. A brooder heat plate is a safer, low-risk alternative.
Inconsistent or Incorrect Temperature
Too hot? Chicks will pant and avoid the heat. Too cold? They’ll pile on top of each other. Use a thermometer at chick level, and watch their behavior to adjust accordingly.
Slippery Flooring
Newspaper or plastic totes without bedding can be slippery, causing splayed legs or spraddle leg. Always use pine shavings or textured bedding for traction and joint health.
Waterers That Spill or Tip
Chicks will trample their water and soak the bedding. Use chick-sized waterers and raise them slightly on a block or tray to reduce tipping. Check the bedding daily to clean up any spilt water and replace shavings.
Overcrowding
Crowded chicks compete for food and water and are more likely to injure each other. Make sure there’s enough space and plenty of access to food and water, and expand the brooder as chicks grow.
Not Cleaning Often Enough
Wet or dirty bedding can cause respiratory issues, foot infections, and stress. Spot clean daily and change bedding at least weekly to keep the environment dry and healthy.
Explore More about Chicken
- Choosing Chicken Breeds and Raising Friendly Chickens
- How to Seal Your Coop
- Remodel an Old Chicken Coop
- Maintain a Smell-Free Chicken Coop
FAQs About How to Make Booders for Chicks
Chicks usually stay in a brooder for 4 to 6 weeks, until they are fully feathered and can regulate their own body temperature without supplemental heat.
Start at 90–95°F the first week, and lower by 5°F each week. By week 5–6, chicks can usually handle room temperature (around 70°F).
Plan for ½ square foot per chick in the first week, and 1+ square foot per chick by week 3. Increase space as they grow to prevent crowding and stress.
Pine shavings are best — they’re soft, absorbent, and help control odor. Avoid cedar (which is toxic) and slick surfaces like newspaper that can cause leg issues.
They don’t need light all night — just a consistent heat source. Using a red bulb can help reduce pecking and stress. If you’re using a brooder plate, they’ll sleep better in natural darkness.
How to Make a Brooder for Chicks
Materials
- Container
- Brooder Heating Plate or Heat Lamp
- Feeder
- Waterer
- Pine Shavings
- Hardware Cloth or Wire Cover
Instructions
- Choose a draft-free brooder container with good airflow.
- Add 1–2 inches of pine shavings for soft, absorbent bedding.
- Install a heat lamp or brooder plate, aiming for 90–95°F the first week.
- Place feeders and waterers away from the heat source.
- Monitor chick behavior to adjust temperature as needed.
- Clean the brooder daily and fully refresh bedding weekly.
- Watch for signs of stress, pasty butt, or overcrowding.


