


How to Make a Chocolate Rock Cycle
The Rock Cycle is something we study in the Montessori curriculum pretty much every year, especially in the lower elementary years because if you’re 6-9 year old is anything like mine (or any of my students) they are all pretty much obsessed with geology!

This post contains affiliate links. This will not cost you anything but will help us offset the cost of running the blog. We only share products we use and would recommend to a friend. Thank you for your support! Click ‘HERE’ for more info.
I have always had a hard time with the rock cycle (I know, kind of embarrassing for a teacher to admit), I just could never remember which rocks would form into which other rocks and how they would change.
This fun chocolate rock cycle project not only made my daughter and other homeschoolers happy, but it really helped me understand the whole process a little bit better too. I also really appreciated the rock cycle graphic and stories that we used from our Geology unit from The Good and The Beautiful.

Types of Rocks
Before we get started with the chocolate, let’s go over what the three different types of rocks are. I know I need this little reminder every year so it’s okay if you do too!
- Igneous Rocks: these are rocks that are made from magma that has cooled and hardened. Some examples of igneous rocks are basalt and granite.
- Sedimentary Rocks: these are rocks that are made from sediments, small pieces of other rocks that have broken apart. These pieces form together to make sedimentary rock when they undergo pressure. Fossils are usually found in sedimentary rocks. Some examples are limestone and shale.
- Metamorphic Rocks: these are rocks that are formed from other rocks that have been exposed to a lot of heat and pressure. Not enough heat to melt the rock but enough to change its form and push the different rocks together into something new. Examples of these are marble and slate.
The Rock Cycle

Now that we have an idea of what the three types of rocks are, let’s briefly go over how the Rock Cycle works. I love that there are so many free resources and graphics that you can use to reference the rock cycle and show your kiddos. Here is a free poster from TeachersPayTeachers that does a great job showing and explaining the Rock Cycle.
In short, here’s what can happen! Igneous rocks are formed from magma. Then, an igneous rock can break up into sediments because of weathering or erosion to become a sedimentary rock. An igneous rock would also be heated and squeezed by pressure into a metamorphic rock.
A sedimentary rock is formed from sediments that have settled and are pressed together (but not heated). From there the sedimentary rocks can break up into more sediments and become a different sedimentary rocks. They can also be heated and pressed together to become a metamorphic rock.
Metamorphic rocks can change into sediments because of weathering or movement and turn into sedimentary rocks. They can also heat and melt into magma to become igneous rocks.
A rock’s journey can be pretty intense! Remember, these processes take a long long time.
Let’s get out some Chocolate!
Here’s what you’re going to need:
- 2-3 kinds (or colors) of chocolate
- bowls/containers to separate your pieces
- grater & knife
- tinfoil
- oven/toaster oven or other heat source
- small baking tray
Here we go! You’re going to start with 2 or 3 different kinds of chocolate. I got almond bark and baking chocolate. If you want to have 3 different “sediments” you can dye the almond bark using food coloring. We were happy with two colors and it seemed to work out just fine.
First Stop on the Rock Cycle: Sedimentary Rocks
First, cut the chocolate into smaller sections and grate it using a cheese grater. This will give you your sediments. Next, use a spoon or your hands to press some of the sediments together. Do this quickly because you don’t want the heat of your hands to warm up the chocolate too much. Making sedimentary rocks only requires pressure, not heat.


Metamorphic Rocks
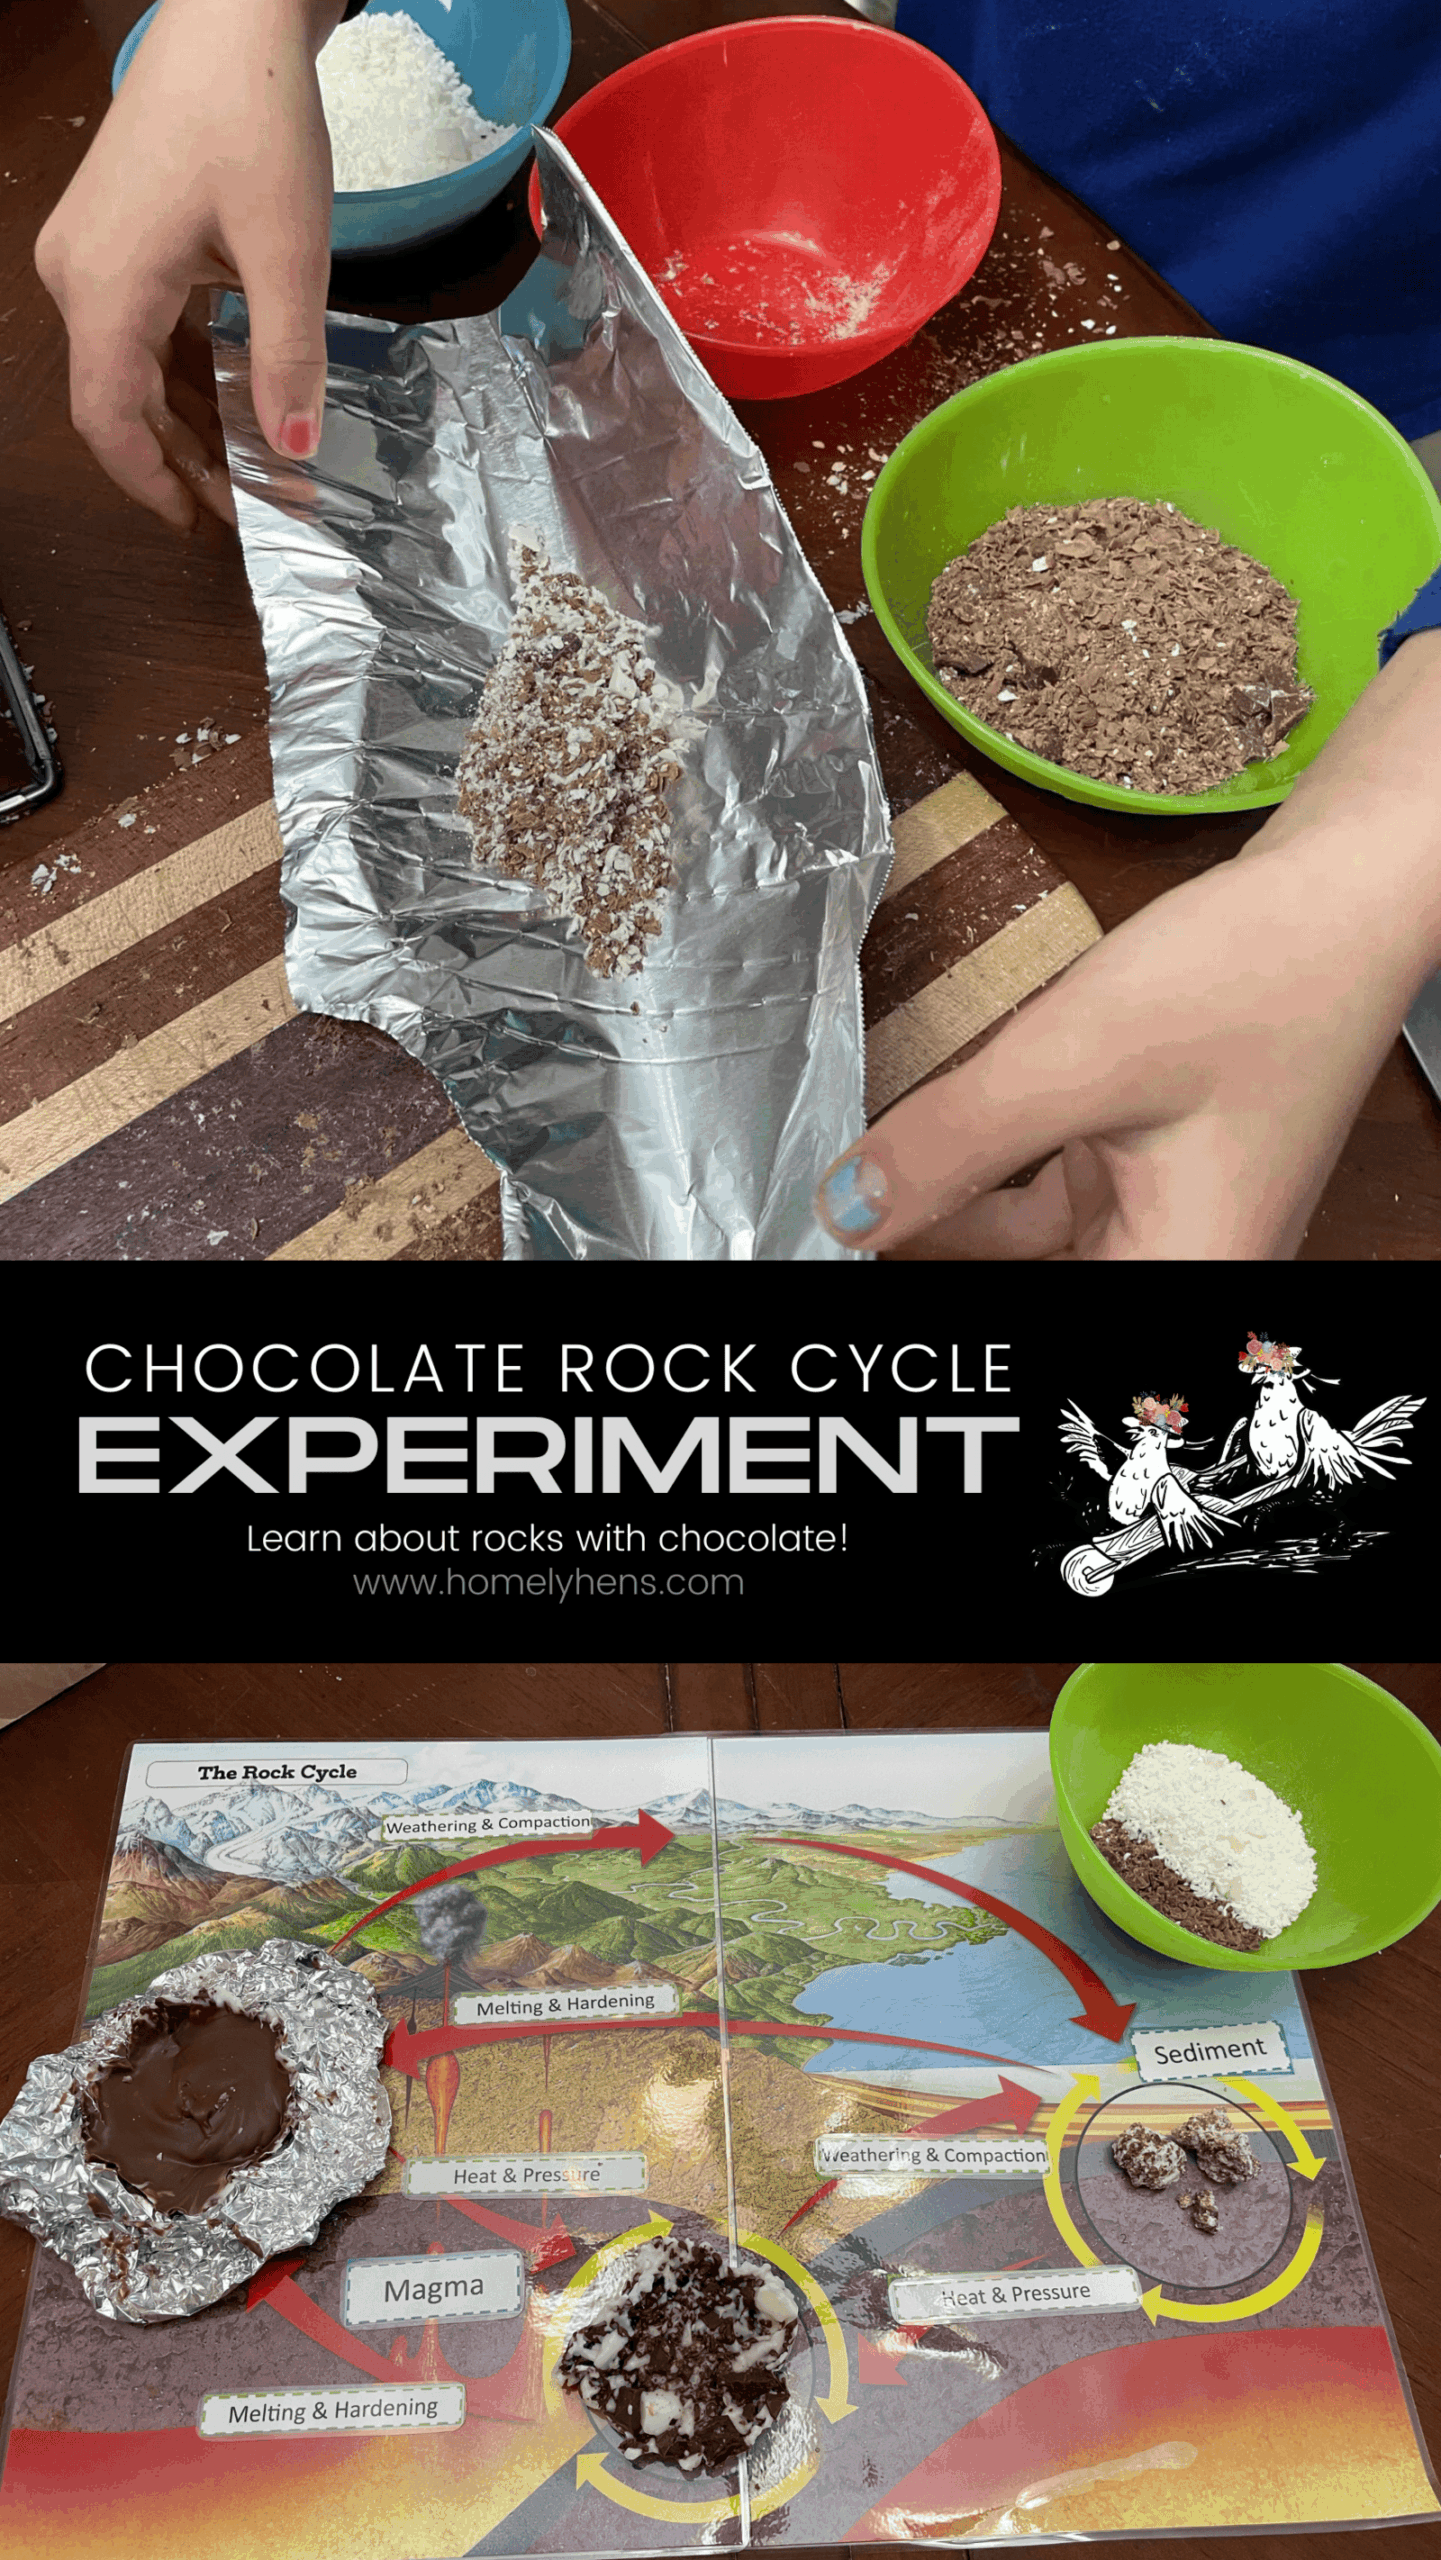
The next stop on our chocolate rock cycle is metamorphic rocks. Make some tinfoil cups and place them on a small baking tray. We used our toaster oven for this process. Take some of your shavings and small pieces of chocolate and put them in your tinfoil cups. We’re going to use heat and pressure now to form our metamorphic rocks. Close the tinfoil around the sediments and apply some pressure with your hands. Leave the tinfoil closed or open it a little and place it back on the small baking sheet.
Put the baking sheet into the oven preheated to 250º or so and allow the rock to heat up, but not totally melt together. Allow the metamorphic rocks to cool completely.


Last Stop: Igneous Rocks
Start the igneous rocks the same way you started the metamorphic rock but leave them in the heat a little bit longer. Add more “pressure” by stirring the chocolate up to make it resemble magma. Once your magma cools, it is an igneous rock! To make this go a little faster, place the tinfoil cups in the freezer.


All Three Types of Rocks Together in the Rock Cycle

Finally, here are the types of rocks together on a rock cycle mat we have from The Good and The Beautiful. This would be a great time to ask your kids what they notice about each type of rock. Which rocks are formed with pressure and compaction? Which are formed using heat?
If you try this make sure you tag me on Instagram @Sam.ThatsMe! If you’re looking for other rock cycle activities, you could try this with Starbursts or crayons too. Check out our Volcano Activities to go along with your Rock Cycle lesson! If you’re looking for some Montessori or homeschool resources check out my Favorite Montessori Homeschool Resources.


One Comment
Pingback: