A Better Way to Seal your Backyard Chicken Coop
Have you spent hours on the internet trying to find the best way to Seal Your Chicken Coop safely? ME TOO! It is crazy the amount of time I have poured into just researching stuff and trying to find out what wouldn’t cost a fortune or harm my hens.
I wanted a sealant that was non-toxic, safe for egg layers, and durable enough to actually hold up over time. And of course, the best idea was to find something that didn’t cost me hundreds of dollars and yet really worked. I didn’t feel that was too much to ask… right? haha
Well, I found a solution that worked. Here is exactly what I used, how it worked, and why I’ll never do it another way again.
Be sure to explore our full Backyard Chicken Keeping guide for everything from DIY coop upgrades to natural health care and daily routines that work.
This post contains affiliate links. This will not cost you anything but will help us offset the cost of running the blog. We only share products we use and would recommend to a friend. Thank you for your support! Click ‘HERE’ for more info.
Why Sealing Your Chicken Coop Matters
Someone gave me a hand-me-down chicken coop from my neighbor that I remodeled. I cleaned it up, rebuilt some parts, and then it was structurally ready for my girls to live in. But I knew I wanted to seal the inside before moving my girls in. Here are some of the most important reasons I found that matter when it comes to keeping your chickens healthy and safe.
- Helps keep mites and small critters from growing in the cracks of the wood.
- Helps prevent your wood from rotting due to moisture.
- I use a deep litter method and wanted the wood to last a long time.
- Helps seal some of the cracks and prevent unwanted drafts.
- Makes cleaning your coop so much easier.
The thing was that all the ideas I kept finding had issues with them. There were chemicals in the seals. It was a long process that would have to be repeated each year, like using paint that would chip. I wanted something super durable that was safe for animals and would last under crazy composting and moist conditions.
My Ah-Ha Moment: Why I Knew Something had to Change
My brain – I laugh at how my brain works at times. I was really trying hard to come up with some idea for my coop, and at the same time, I was thinking of the 100 other projects I wanted to be tackling. One of those projects was sealing up my stock tank. I had already attached the filters, and we were using the tank. But sealing it was a future project I knew needed to be done in order to have it last.
I had spent hours researching the perfect sealant for the stock tank as well. And that is when I had my ah-ha moment. Why couldn’t I use the same product I wanted to use on my stock tank on my chicken coop!? It was safe for animals, waterproof, made to be painted on wood, and would hold up long-term, EVEN sitting under all that compost. I felt like I thought of some magical secret here!!! haha
The Game Changer? Pond Shied – Here’s Why It Works
So are you ready for it? …..The best thing to seal your chicken coop with is POND SHIELD!
Pond Shield is an amazing product. It is epoxy that is used to paint the inside of a pond or a fish tank. People create huge tanks out of cement and/or wood and use this product to create a sealed tank to raise fish in for aquaponics and such. It, of course, has become popular with everyone building backyard stock tank swimming pools because it bonds to the metal as well. My thought was if it is amazing enough to bond with wood and hold water right up against it, it would be amazing to hold composting chicken poo.
I called the Pond Shield Company and spoke to them about my ideas. They were very excited to tell me that the idea I had come up with would work.
So I jumped on Amazon and bought myself 2 packages of the Pond Shield ….. I went with white, of course. (wink) But there are many colors to choose from.
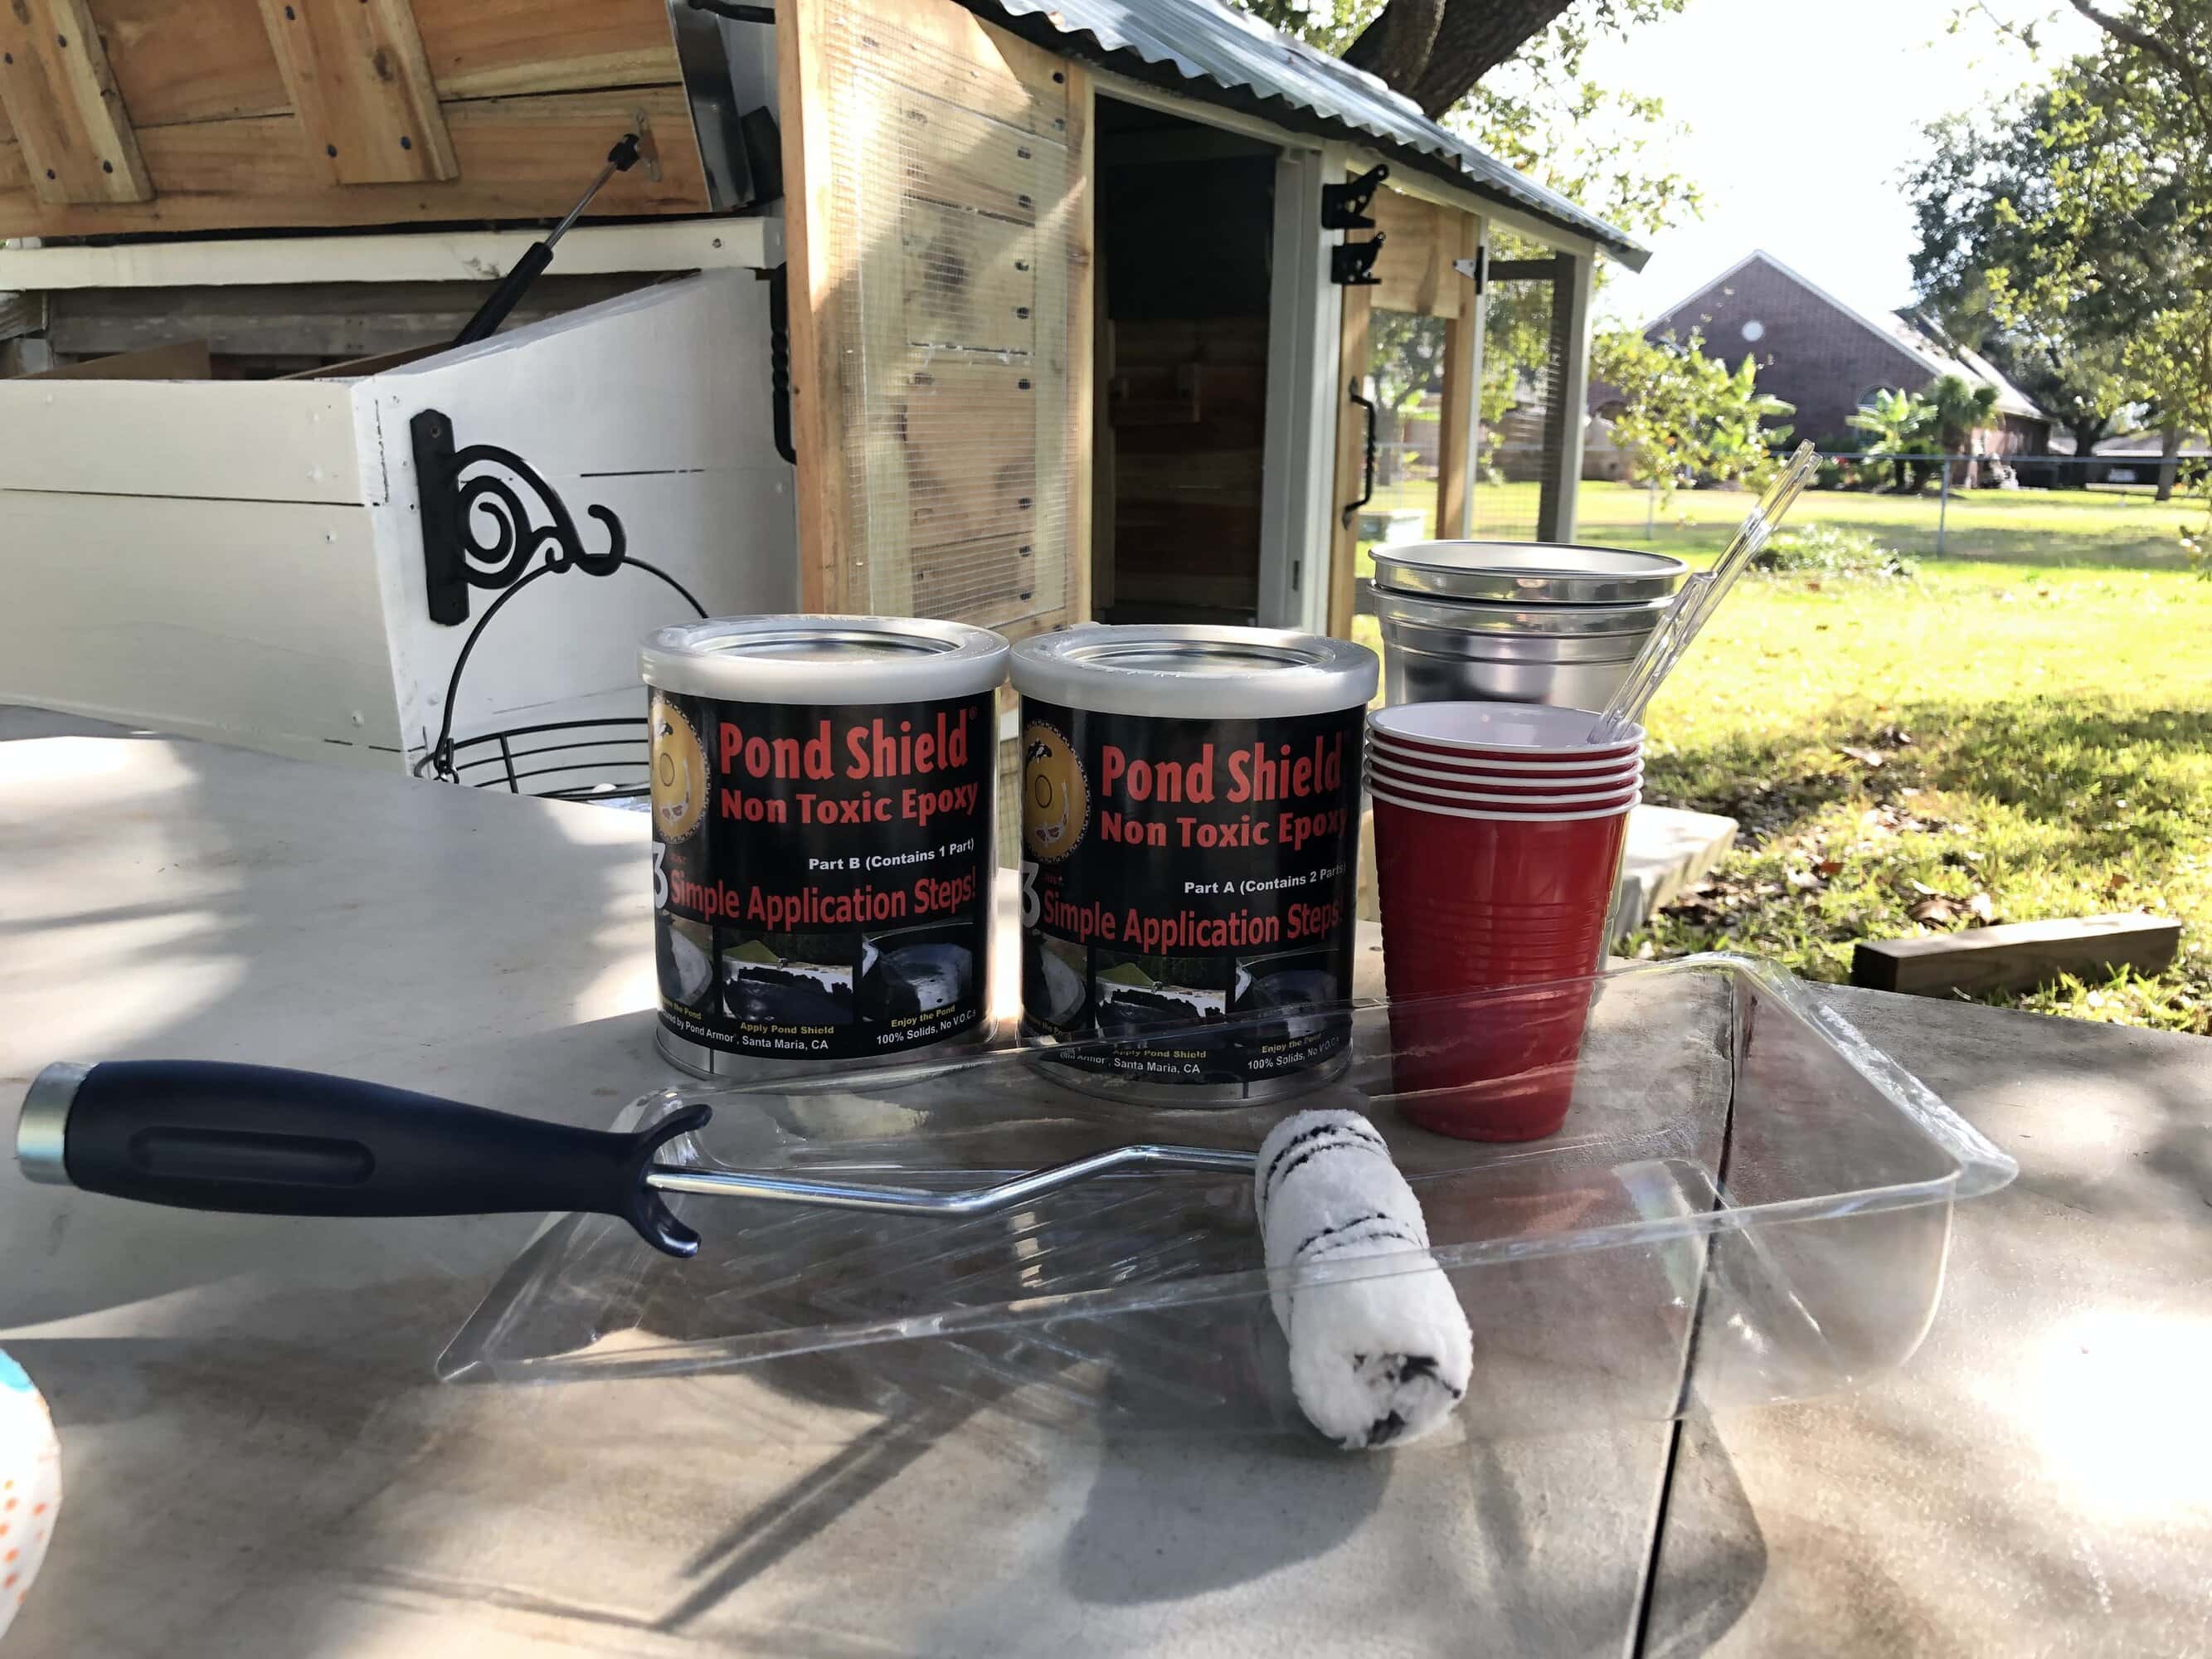
Supplies You’ll Need for a Strong, Lasting Seal
- Pond Shield
- Paint Brush (cheap and to throw away)
- 9″ Paint Roller
- Paint Roller Covers
- Disposable trays
- Mixing Cups (I used aluminum cups – solo would work too)
- Gloves
- Mixing Sticks (I used plastic knives)
- Old Clothes
- Hat or something to Wrap YOUR Hair in
That last one is so important! Haha, I painted the Pond Shield inside the whole coop, and let me tell you – it dripped from the roof and got into my hair, and it took 6 months for the last of it to come out. It was by my roots and in a place that I could not just trim off… so COVER THAT HEAD! haha
Start with a Clean Slate: How to Prep Your Coop for Sealing
Of course, you want to gather all your supplies. I used a fold-out table to make it easy. But remember this stuff does not come off what it touches, so cover the table with newspaper and such if it is something you want to still look pretty when you are done.
Be sure to read all the directions first before mixing anything to ensure you have everything you need and know what steps to take. It dries fast, so you will want to work quickly. You won’t want to stop and read anything.
I did not use more than 2 mixing cups to measure my stuff out. But have extra stuff on hand in case you need it.
After I was totally set up, I cleaned out the coop the best I could. I used a handheld broom to get everything out.
Before You Begin: Tips to Make the Job Smoother
Get a game plan of where you are going to start and what you are going to paint. My one piece of advice is to tell you to do what you can not reach easily first. Also, working in small batches for me worked easier. You can also break the project into parts. If you paint the whole thing and then have to crawl on top of tacky epoxy to paint the second coat, it may cause issues.
I used the paintbrush in all the corners and any small areas that I knew the roller would not reach. Then I used the roller on all the flat surfaces.
IF you are limited in the amount you can use, I would suggest at least doing the bottom 12 inches or so of the walls and all the floors in the coop as well as the nesting boxes. These are the areas that get most of the dirt. Of course, covering the whole coop, including the ceiling, will really help keep the coop so much cleaner in the long run.
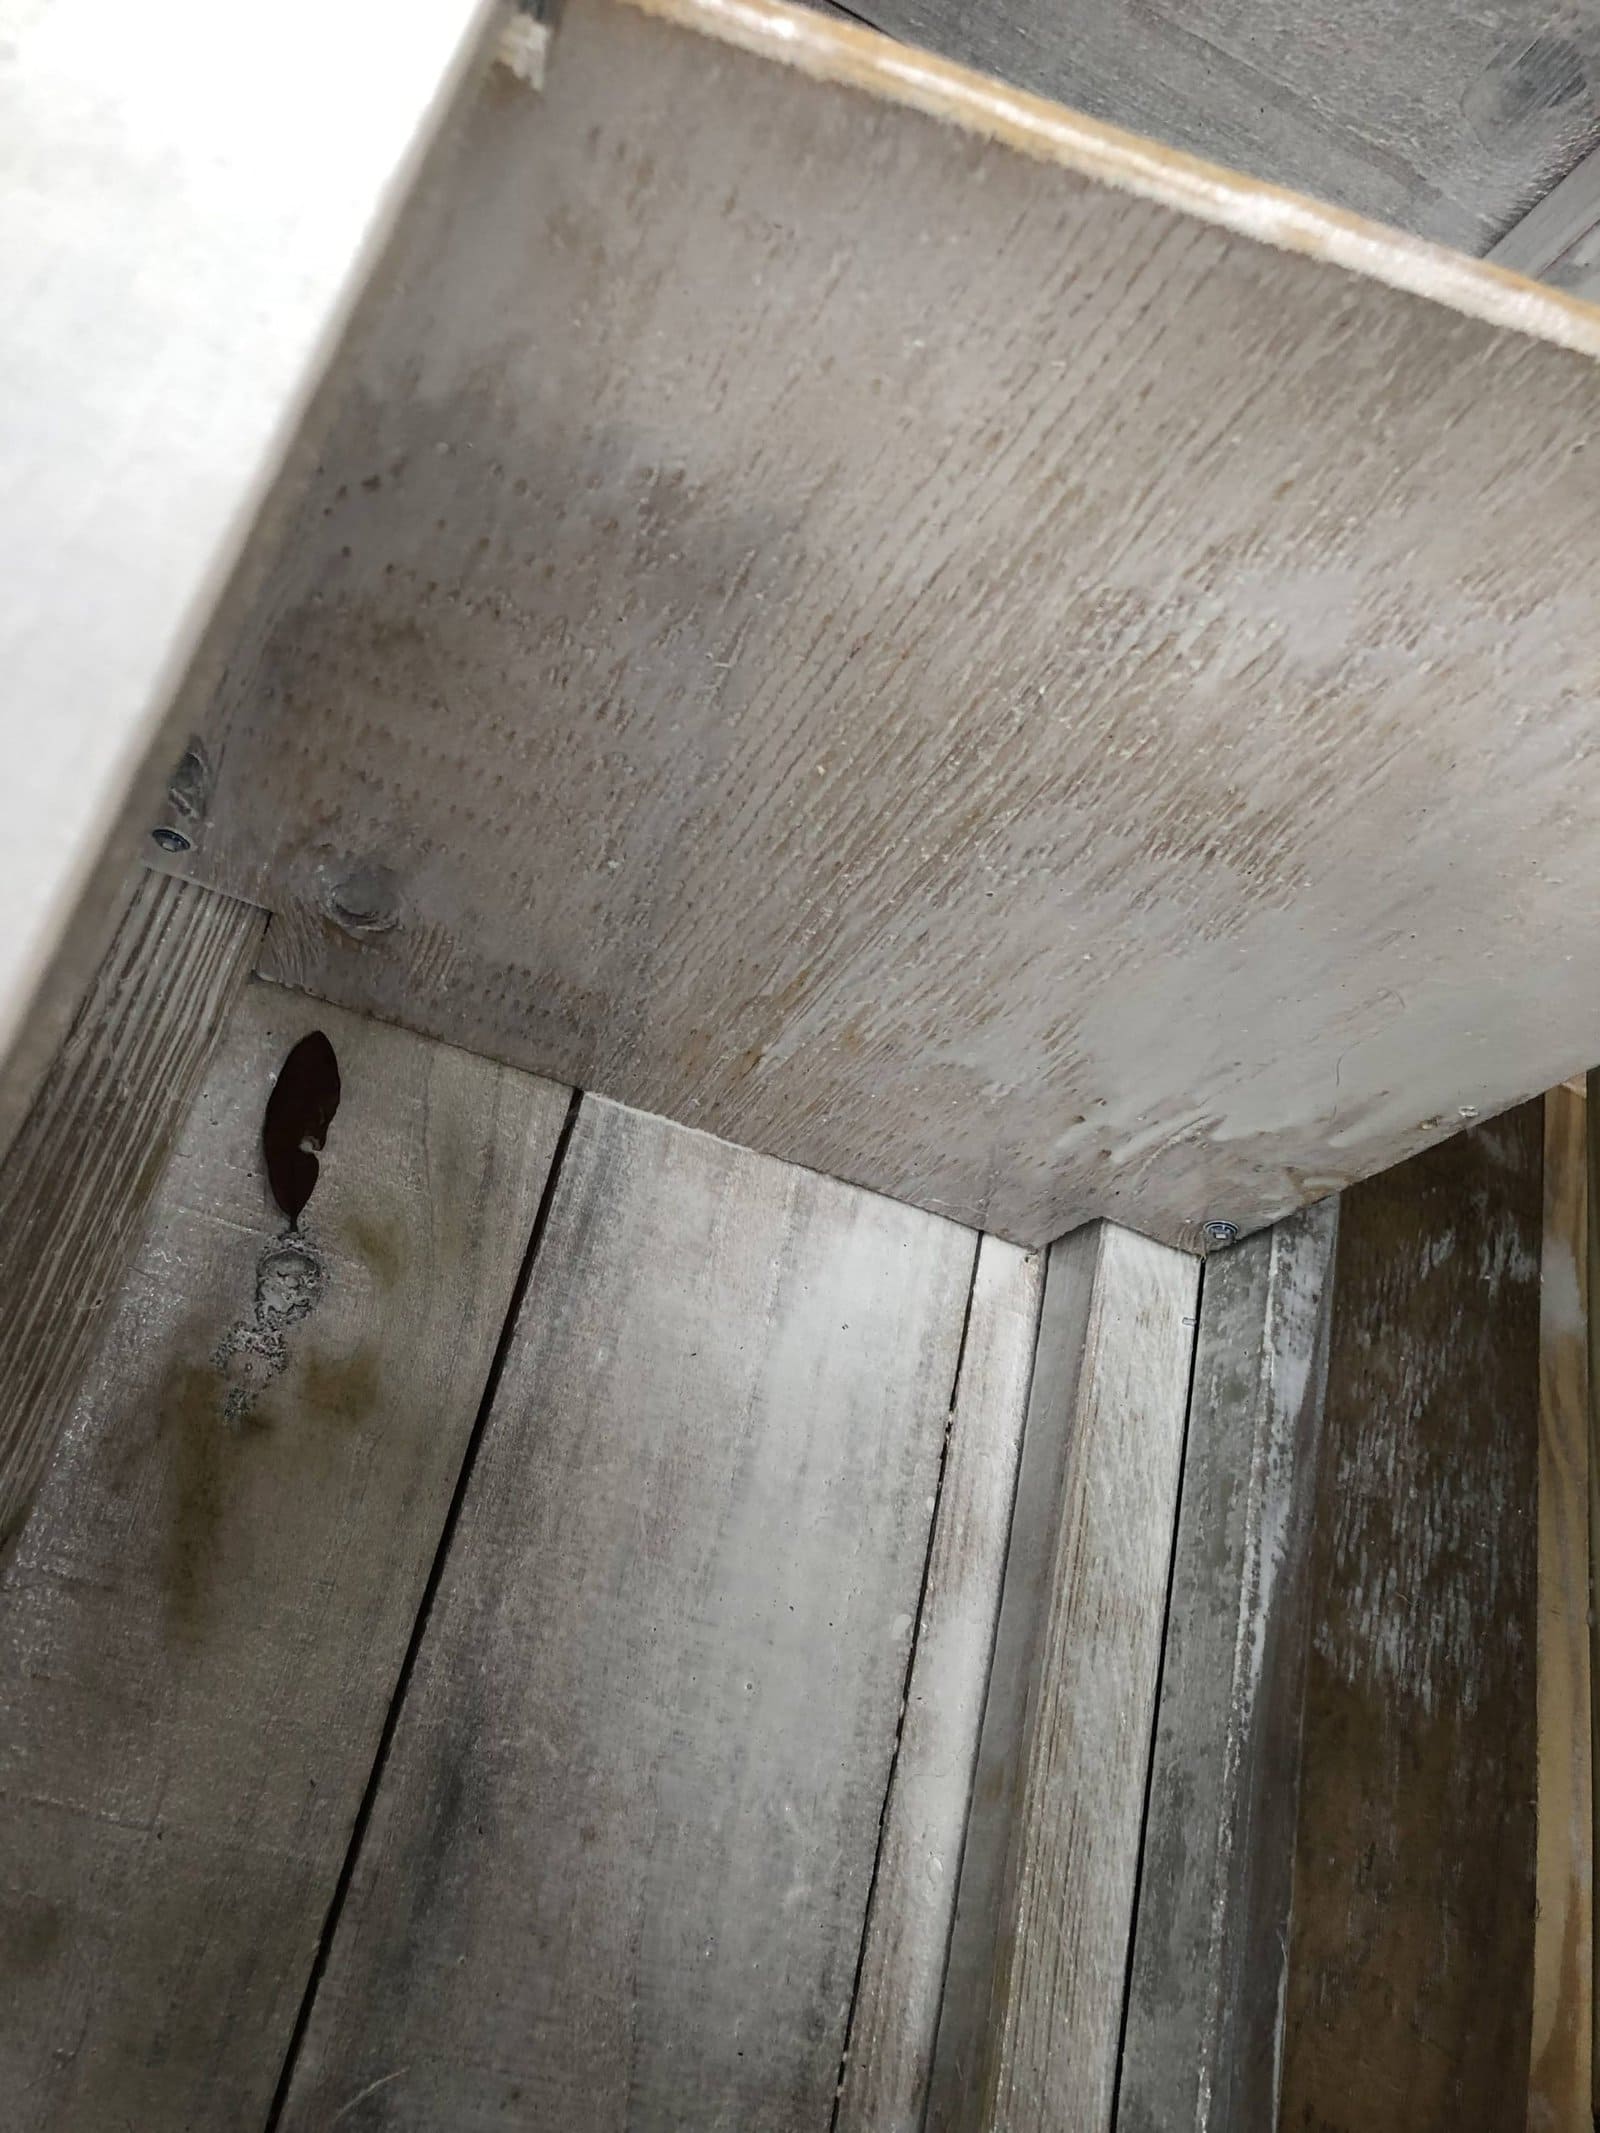
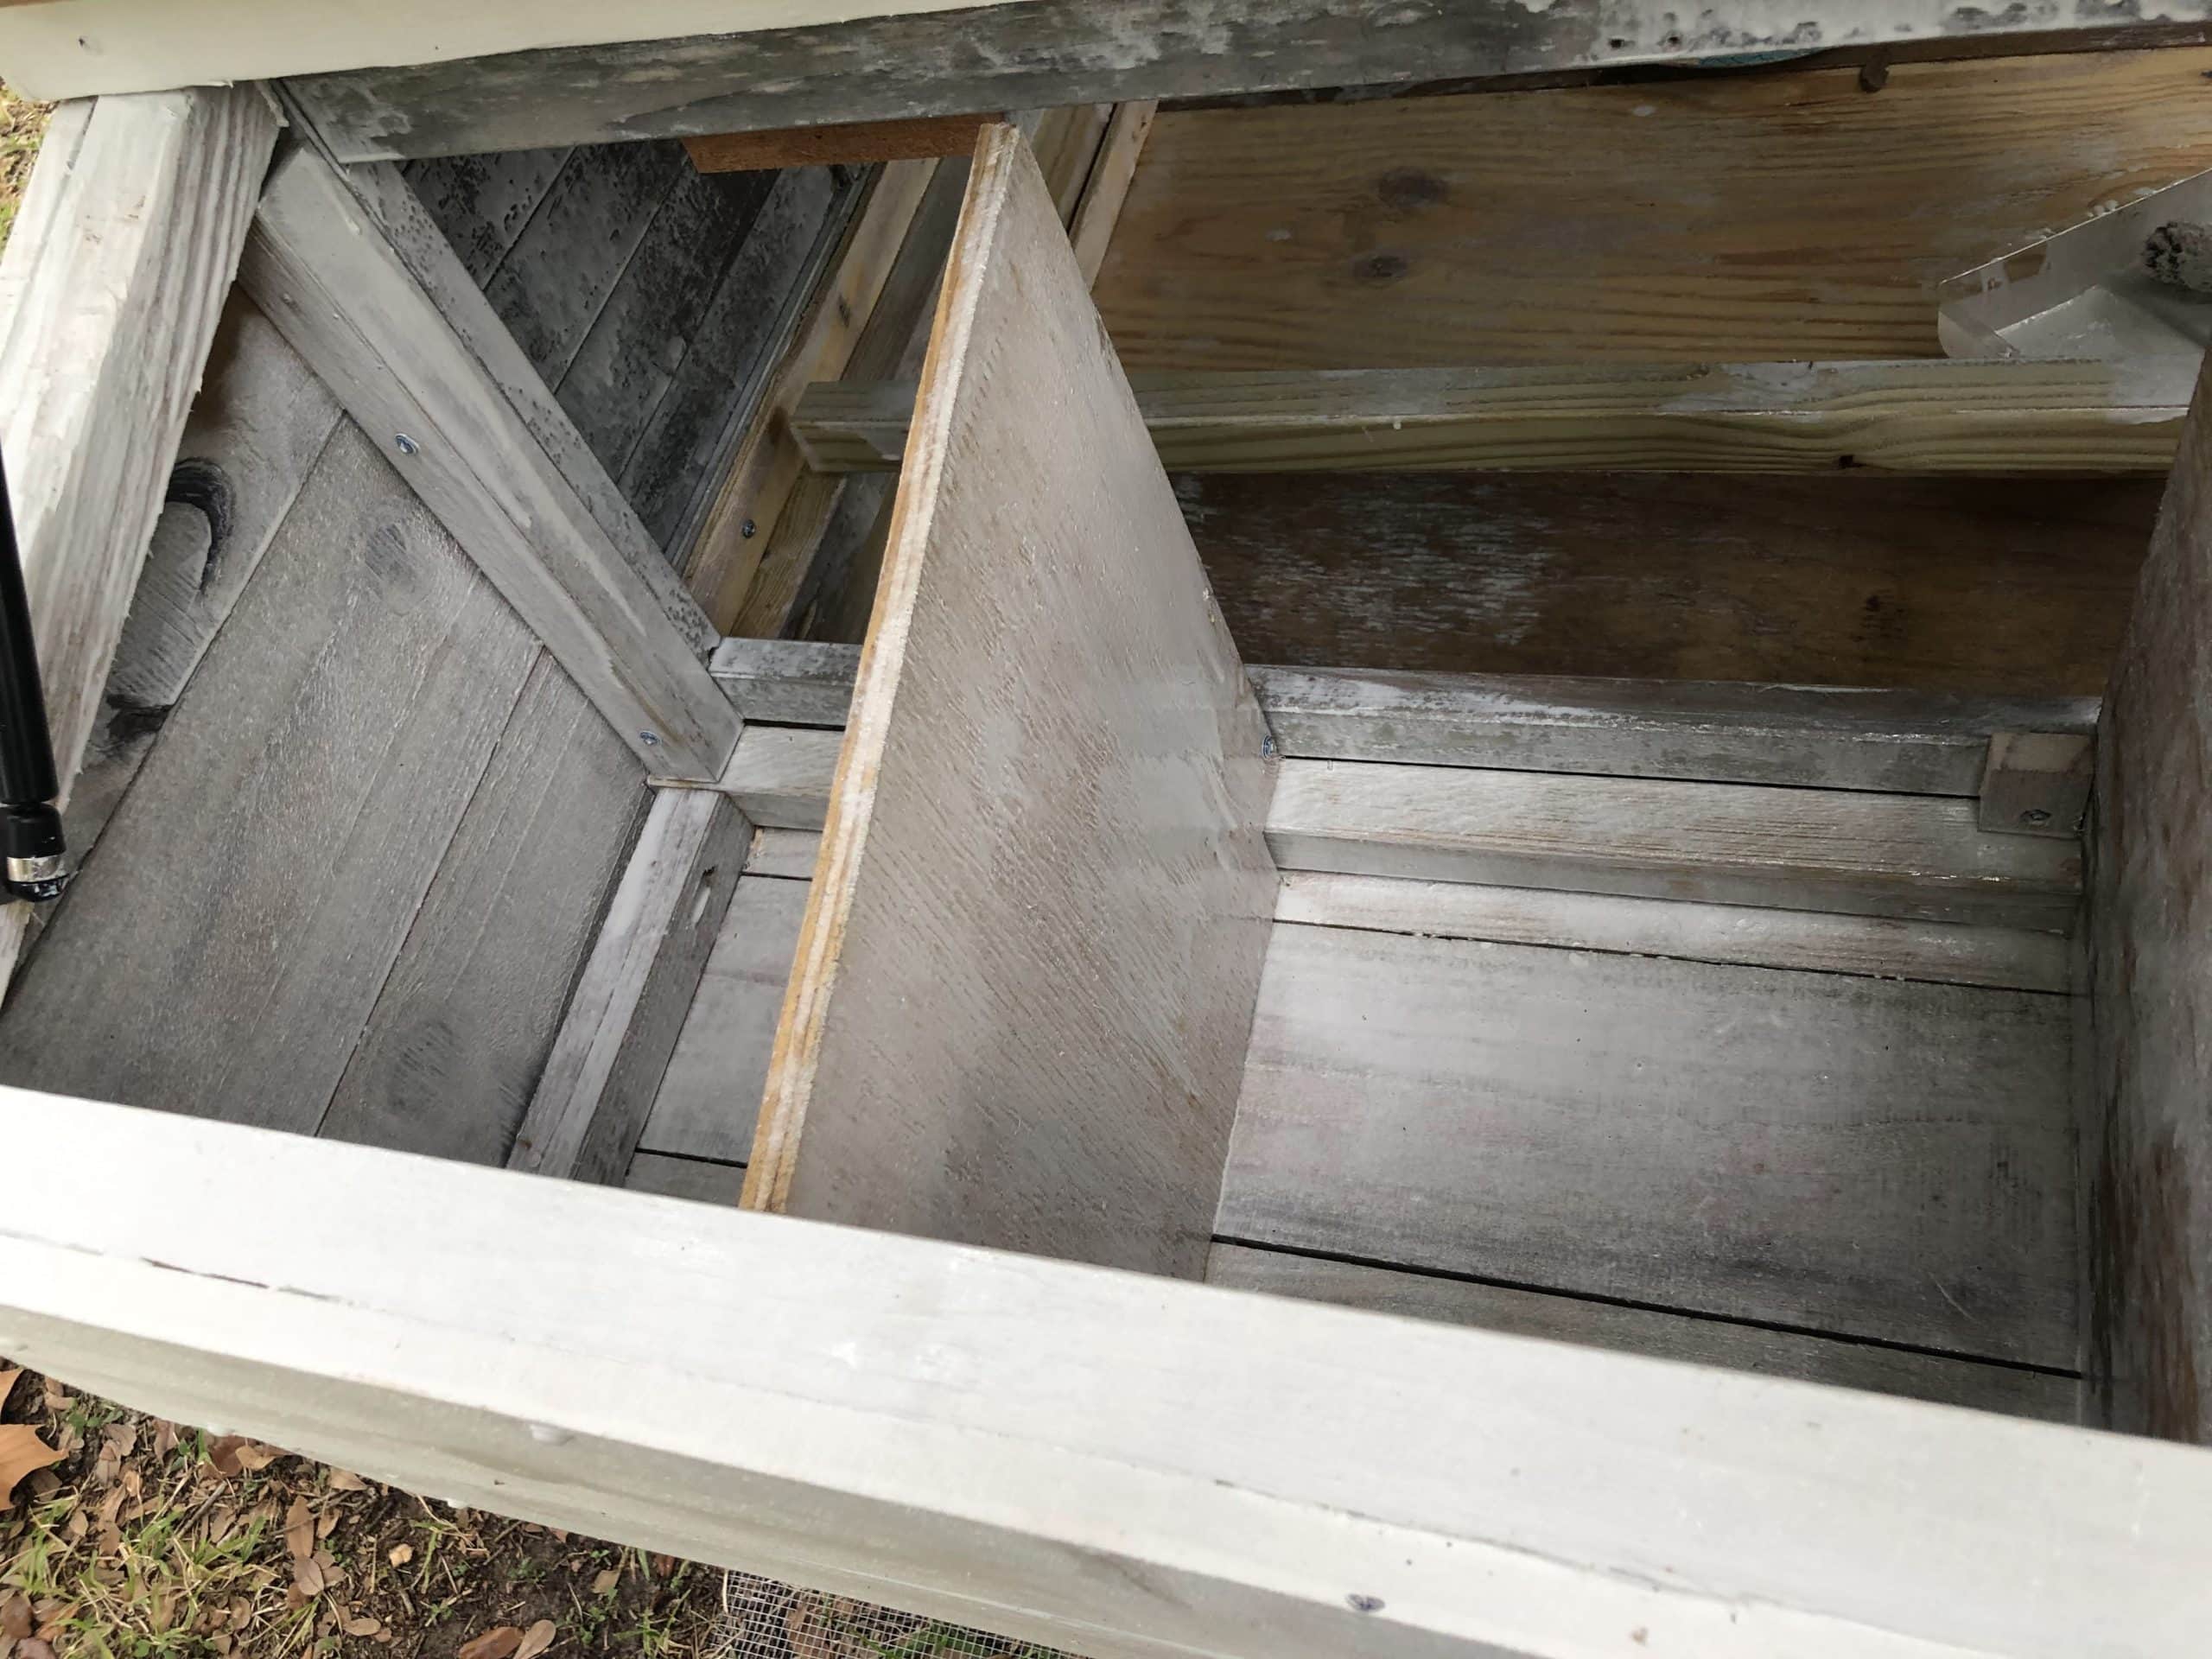
How to Apply the First Coat of Pond Shield
Your first coat will be a bit thin and might even come across as a bit see-through when you apply it. Don’t worry, though; that second coat will cover it all up nicely. Allow the first coat to dry following the instructions.
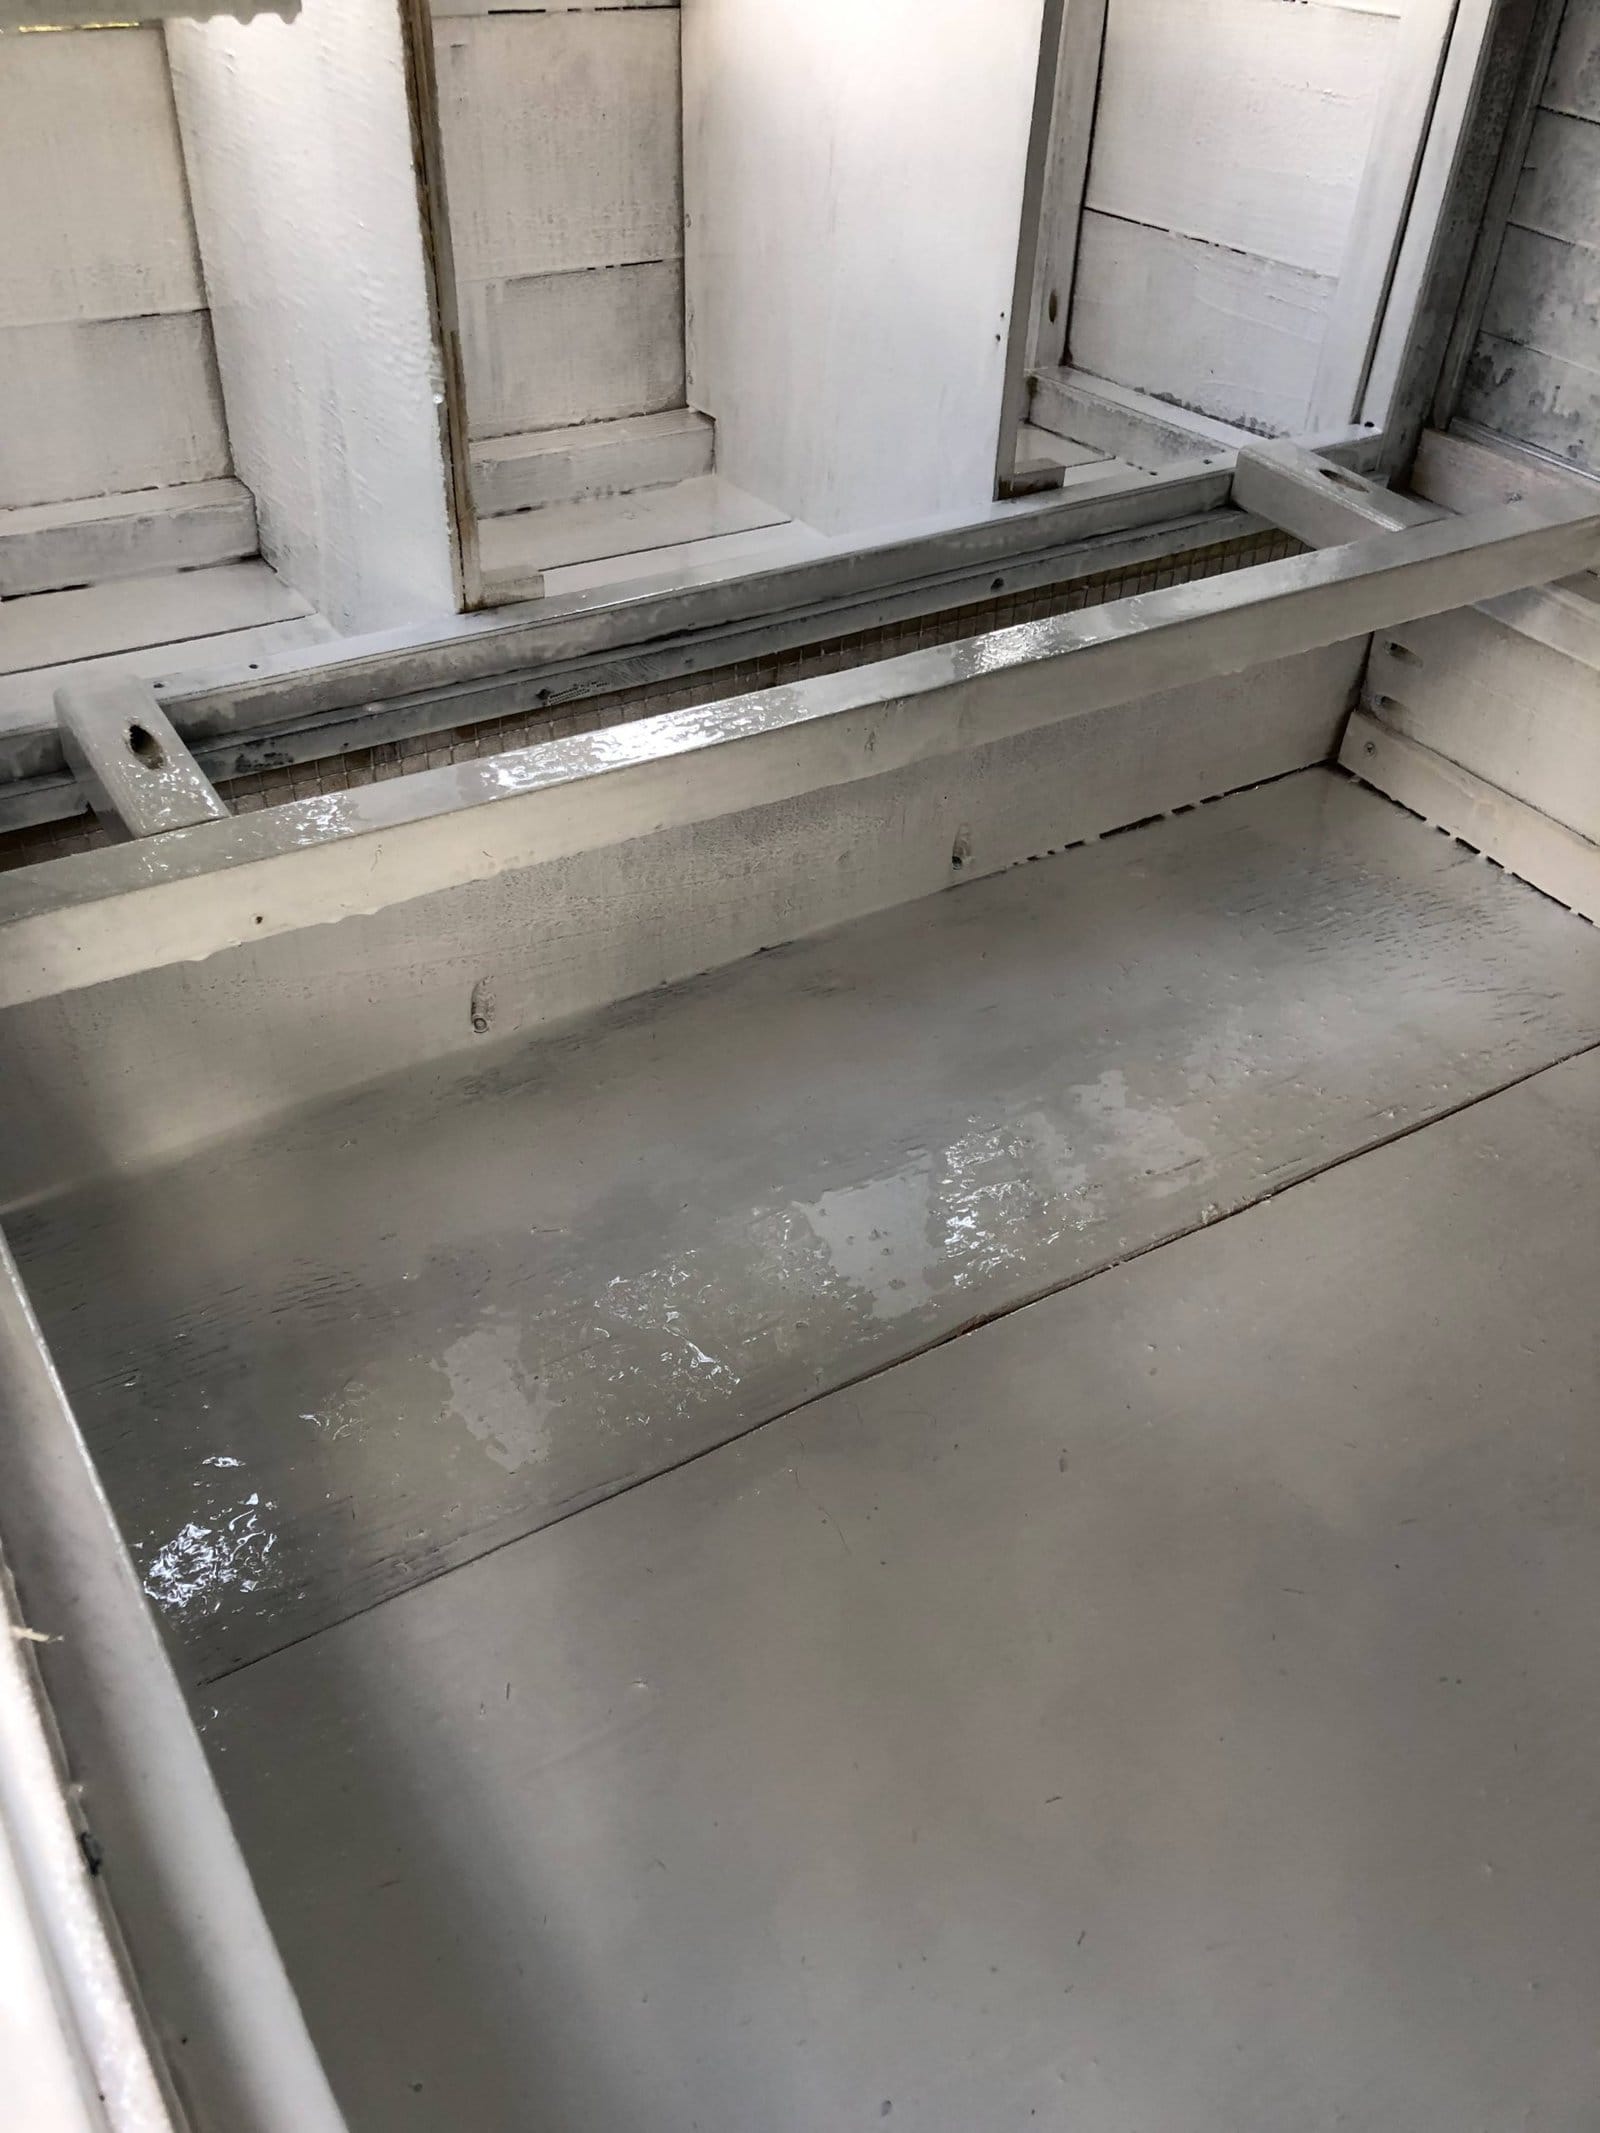
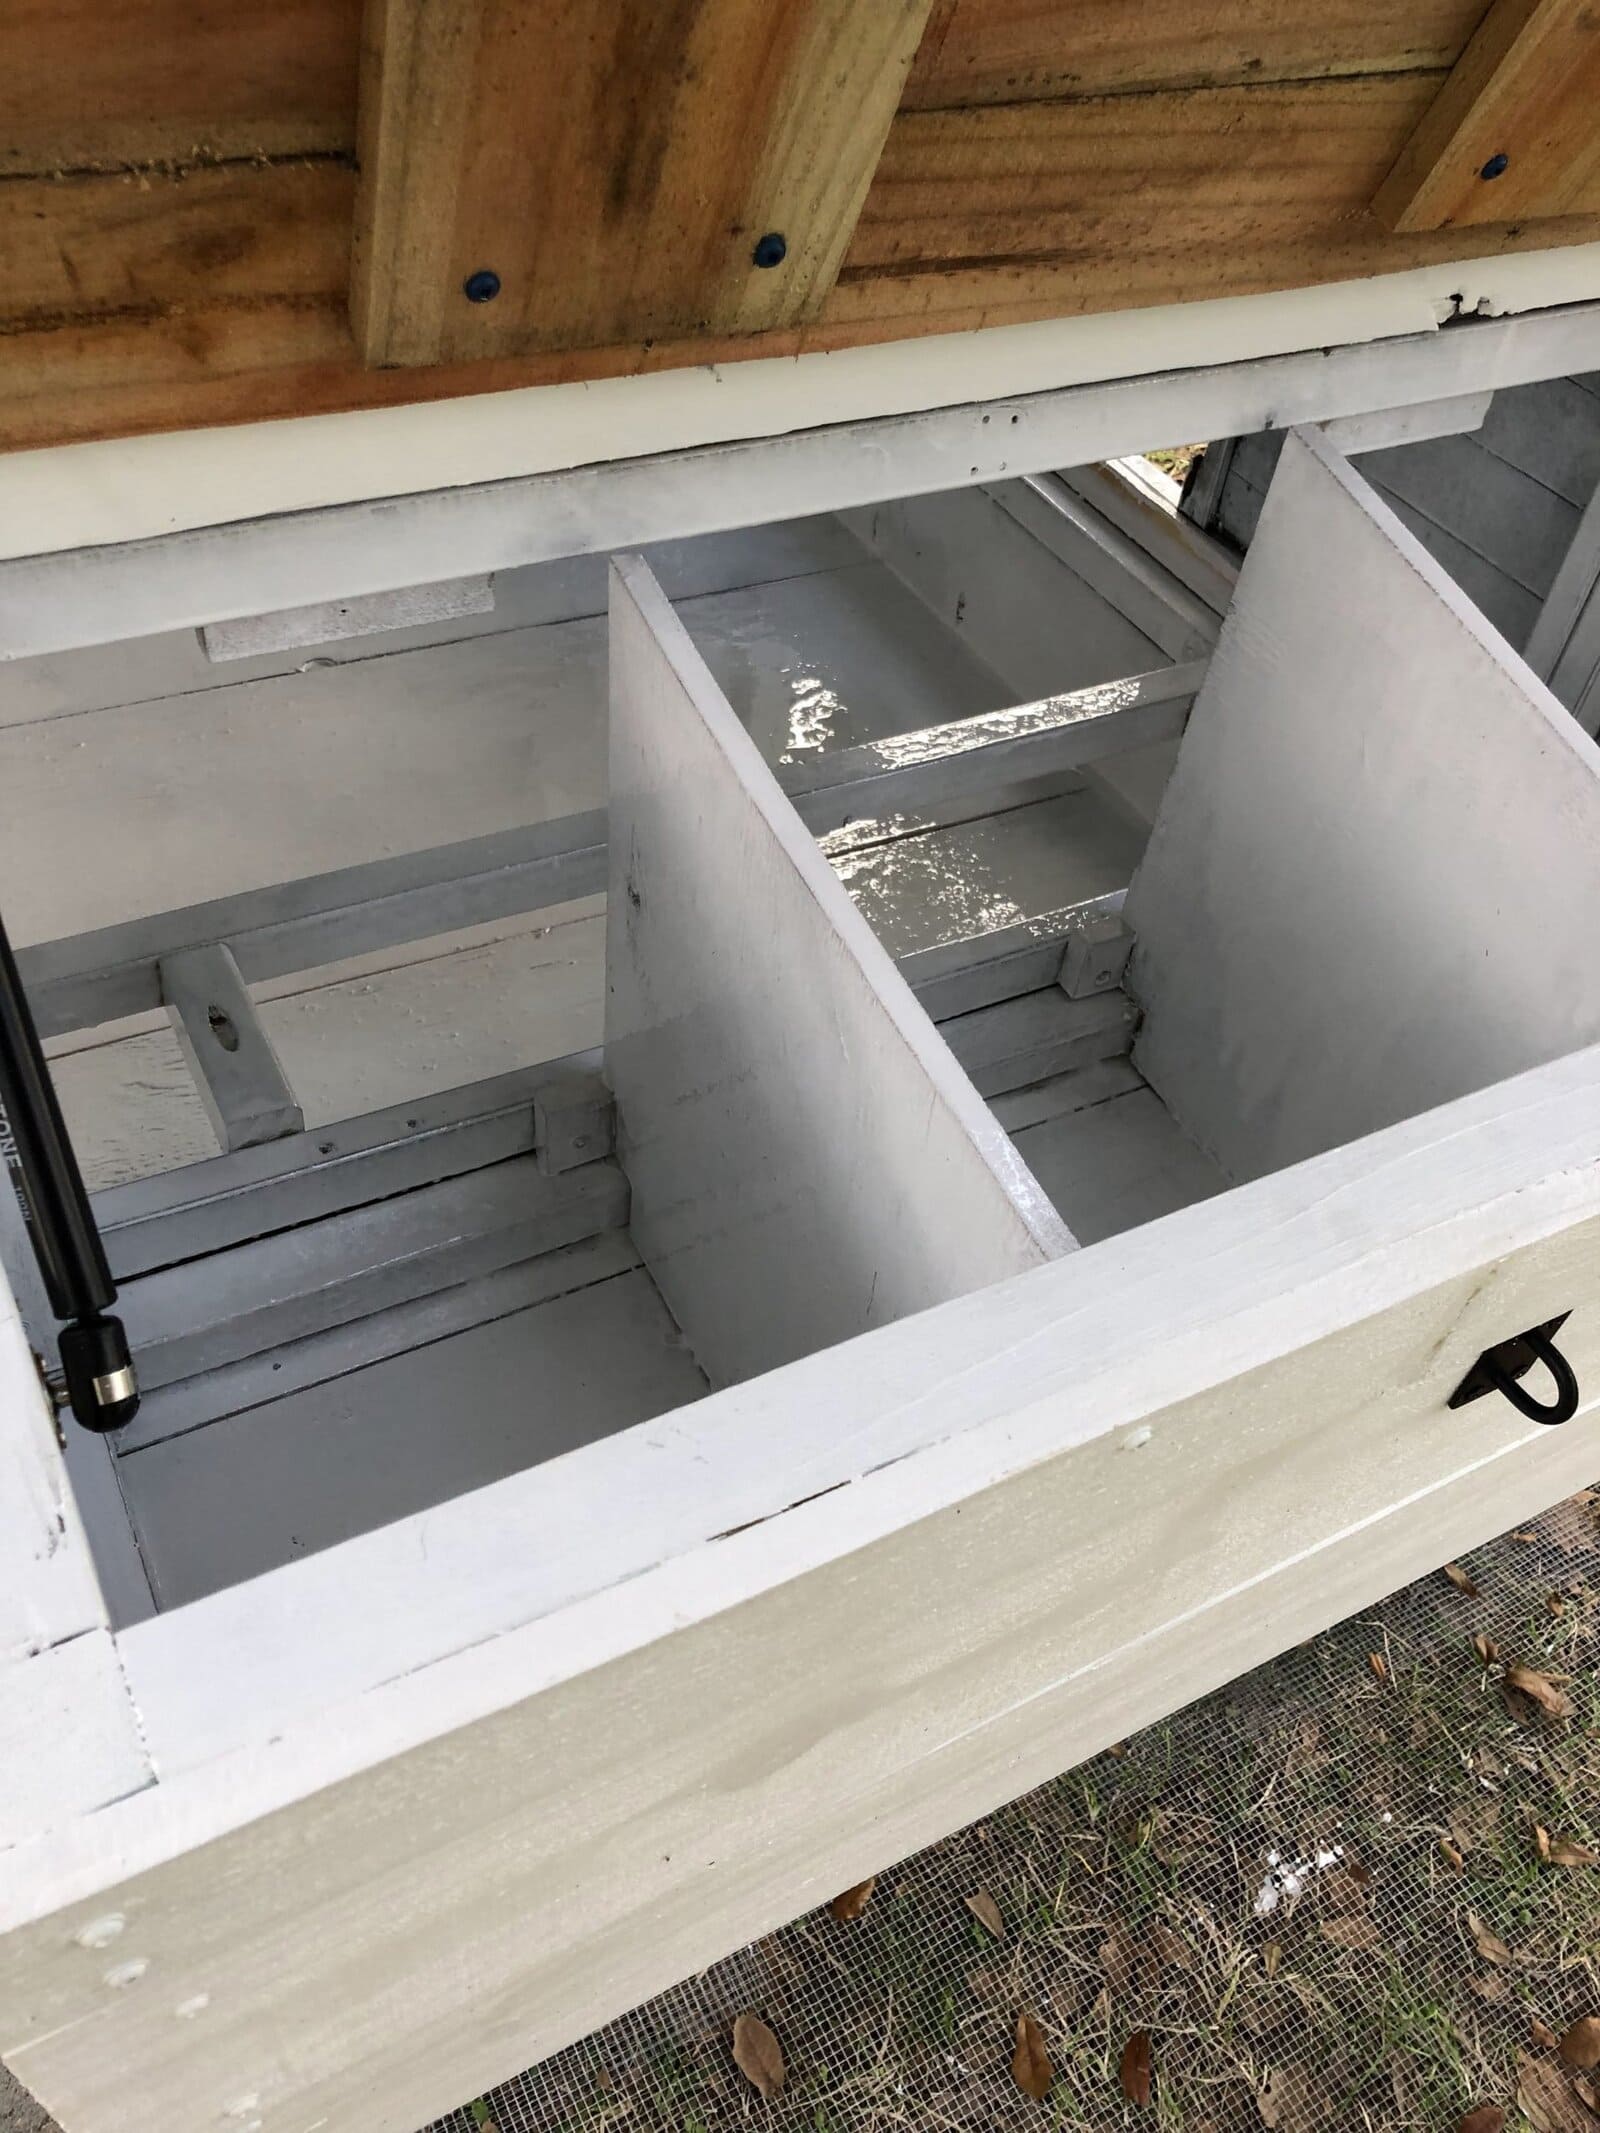
Applying the Second Coat for a Solid, Seamless Finish
Your second coat is where the magic is. It paints on so nicely. And in the photos above, the Pond Shield is not wet anymore. It has a really nice, smooth surface, which helps fill in all the little cracks and crevices in the wood.
That smooth surface is also what helps when it comes to cleaning the coop out. Rinse it right out and wipe it down. It is so easy to clean!!
I allowed the Pond Shield to dry fully, and then it was ready to go! I added my bedding, and it was ready for my girls to use as their new home.
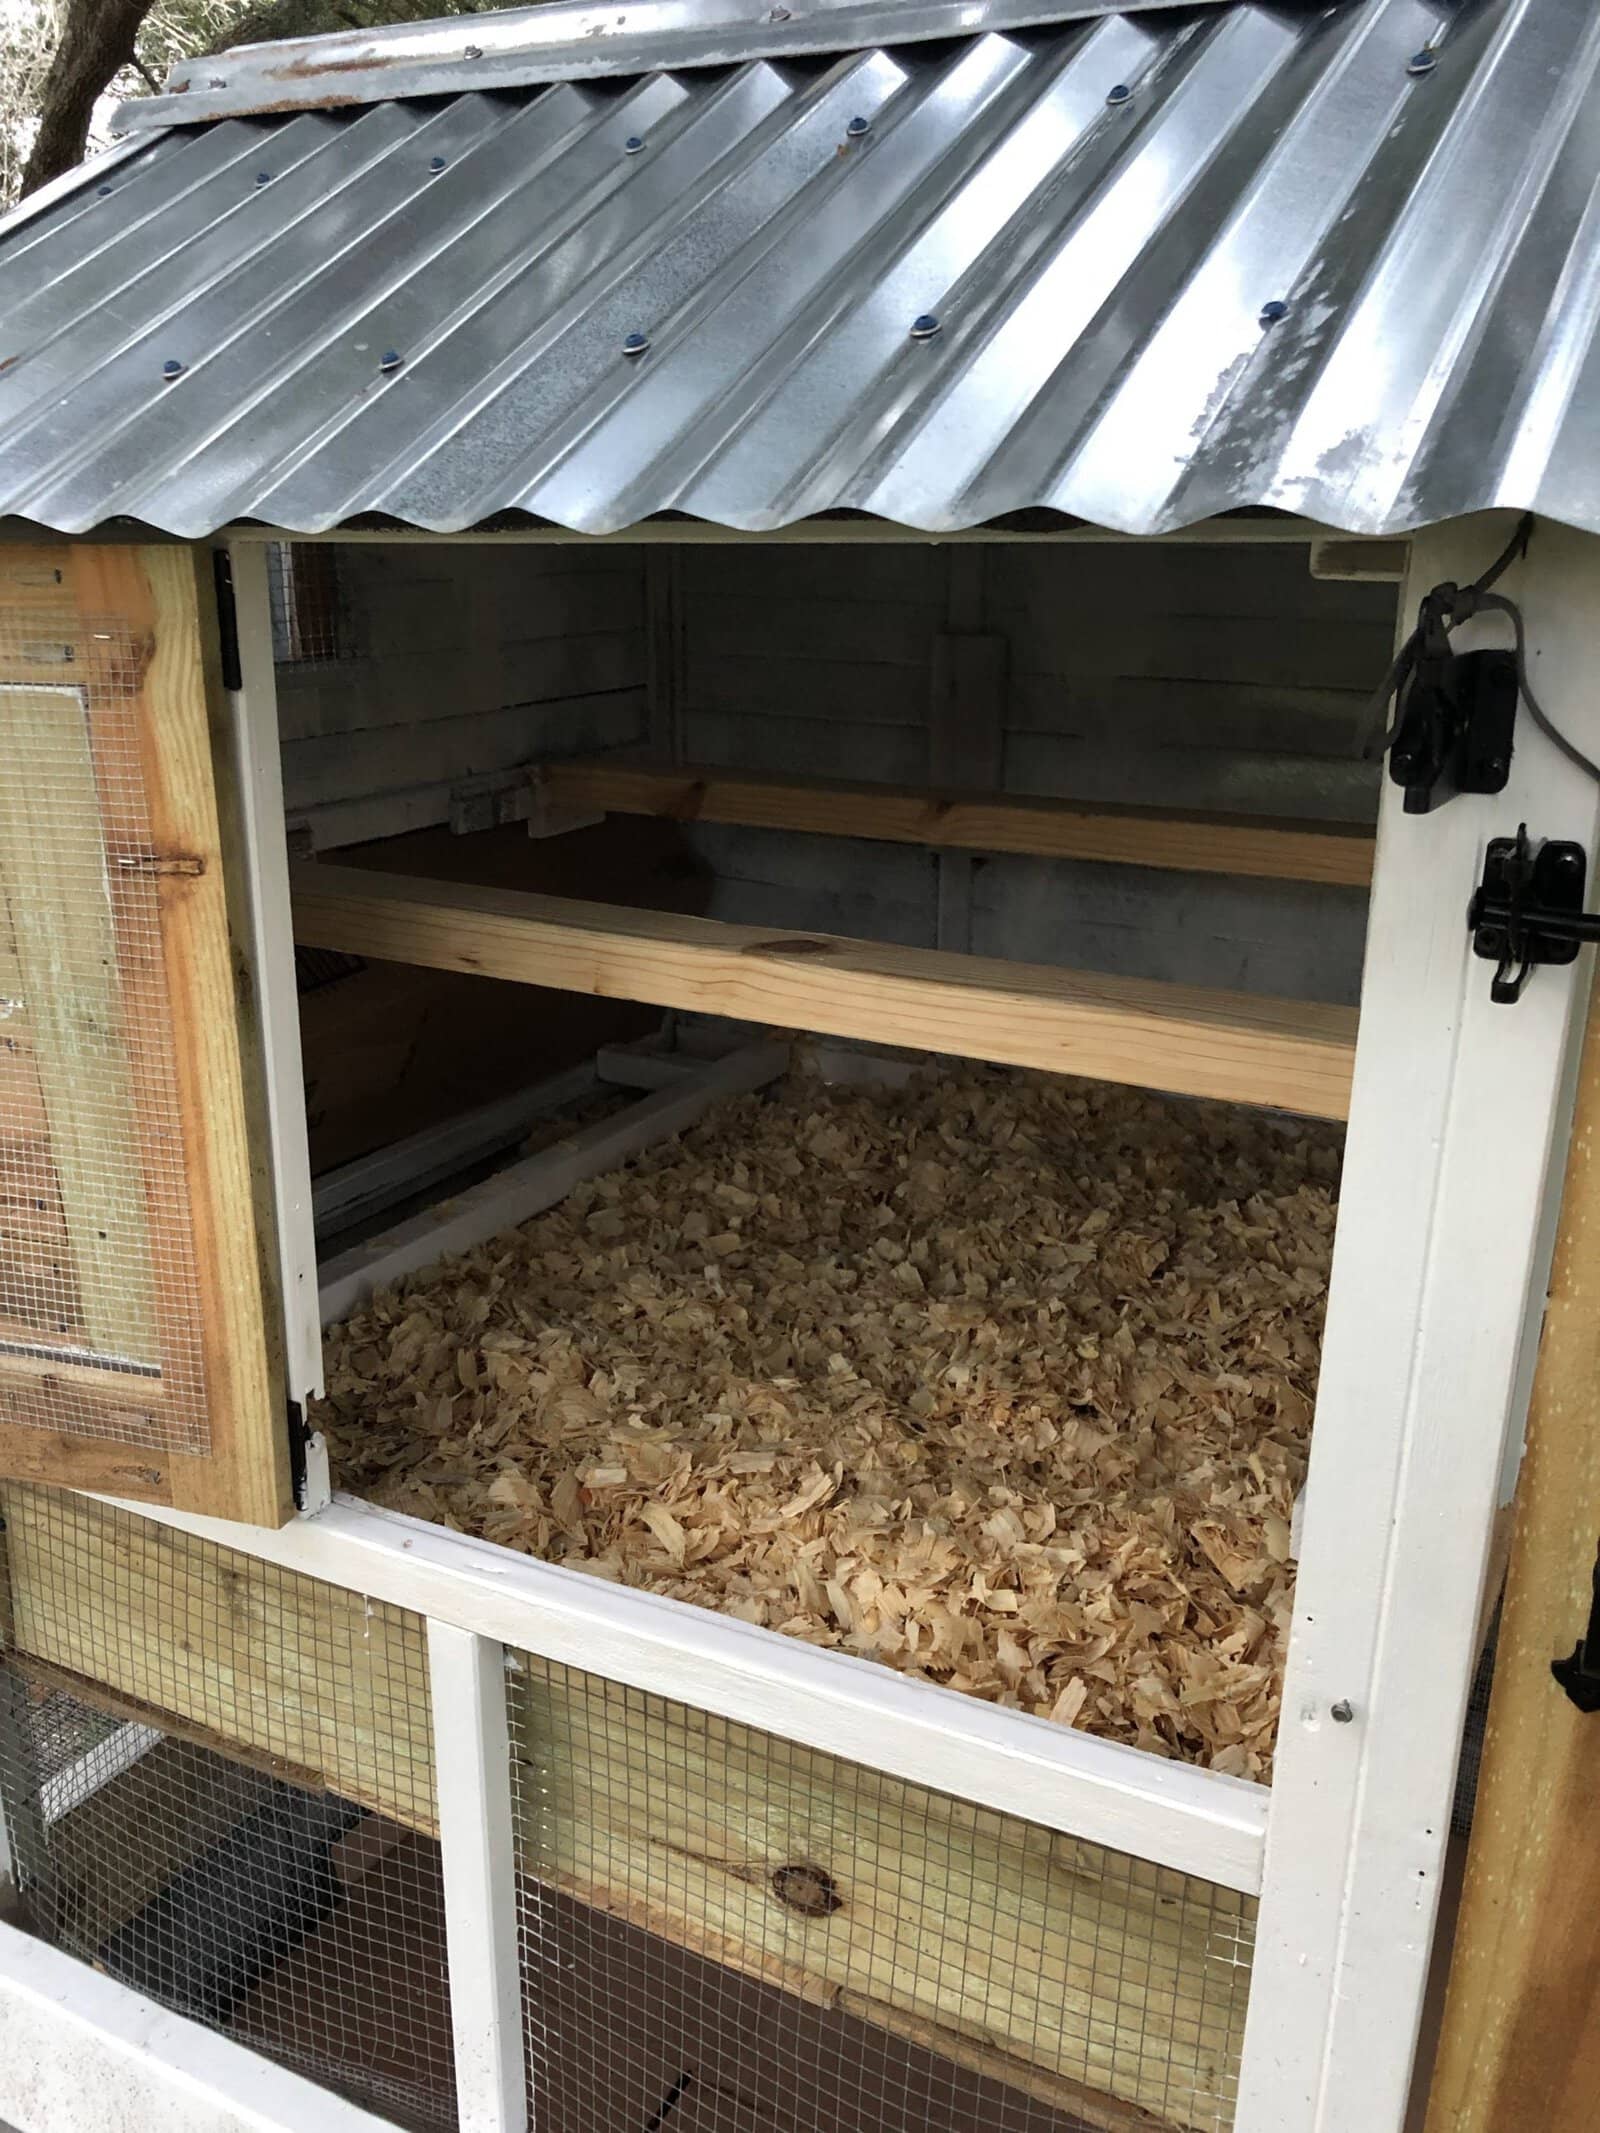
UPDATE: Since I sealed this back in November of 2021, I have, of course, used the heck out of it. My deep litter is inside here. I turn it with a pitchfork all the time. The walls have been pooped on and cleaned off easily. The nesting box has been wiped down. There has been no visible damage that I have been able to see. I am so happy I made this choice, and I tell everyone about it!
Explore More Coop Care and DIY Tips
Ready to level up your coop care game? From predator-proofing to natural odor control, we’ve got trusted guides and smart DIYs to help you protect your flock and simplify your chores. Check out these reader favorites to keep your chickens healthy and your homestead running smoothly.
- How to Make a Brooder
- How to Identify Coccidia
- Maintain a Smell-Free Coop
- Secrets to Raising Chickens when Busy
- How to Raise Friendly Chickens
Frequently Asked Questions About Sealing a Chicken Coop with Pond Shield
Have questions about using Pond Shield to protect your chicken coop? Below you’ll find answers to the most common concerns about safety, durability, and application, so you can seal with confidence and keep your flock dry and healthy.
Yes! Pond Shield is a non-toxic, food-safe epoxy once cured, making it a safe option for sealing surfaces your chickens may come into contact with.
Pond Shield cures in 24 hours under ideal conditions, but it’s best to wait 48–72 hours before allowing chickens into the area to ensure it’s fully hardened and odor-free.
Yes, prep is crucial. The wood should be clean, dry, and free from dust or debris. Sand rough areas and wipe clean before applying for the best adhesion.
When applied correctly, Pond Shield creates a long-lasting waterproof barrier that holds up well in extreme temperatures, humidity, and chicken scratching. It’s more durable than typical wood sealants.
Coverage depends on your coop size, but 1.5 quarts generally covers about 60 square feet. Use a little extra for corners, joints, and seams.
It’s not necessary, and there are different colors to choose from. Painting the sealant will just peel eventually and can cause issues for your chickens, leaving pieces of paint that they might eat.
Keep Your Coop Dry, Durable, and Done Right
Sealing your chicken coop with Pond Shield is one of the smartest upgrades you can make, especially if you’re tired of battling leaks, rot, or messy cleanup. With this step-by-step guide, you’ll have a moisture-resistant, long-lasting barrier that’s safe for your flock and built to last through every season. Got questions or tips from your own build? Drop them in the comments—we’d love to hear how it went!







15 Comments
Meg
Hi Lisa,
This is a great post and just the type of info I was looking for.
I do have a question though; Have you noticed that this makes your floors slippery? I understand that you use the deep litter method so, you may not even notice. For me, we live in a four season climate so, regularly go in our coop with wet boots. I love the aspect of this sealing the wood in a non-toxic way, but also don’t want to be sliding all around while going about our chicken duties.
Any insights on this that you’re willing to share would be appreciated.
Thank you,
Meg
Lisa Scott
It is slick. So if you are going to walk on it, you can do a final coating mixing sand into it to cause it to have a rough texture. If you end up using it I would love to see your results. It has worked really well for me.
Vicki
Hi, such a great idea! Do you know if this can be painted over with cuprinol after, as I’m not keen on any of the colours. Will this affect how it works at all?
Lisa Scott
I am not sure really. I would reach out to the manufacture on that question. I have called them before and they were super helpful. They have their information on their website to call them. https://www.pondarmor.com/ If they say nothing can be painted over it, I would ask if something could be added to the white one to achieve the color you are looking for.
Merna
Used the pond seal. Granted, it will provide protection but I spent ages painting my coop for it look look like crap up close because the pond seal is so volatile.
Lisa Scott
I am so sorry you had issues with yours looking bad. I would reach out to the pond people to troubleshoot it if you intend on using it again. I had no issues with mine, but I was careful to pay attention to the humidity and not work in the heat of the day. The South Texas weather is a beast! It has been over a year since I applied mine. Each time I wash my coop I rinse everything away and it still looks brand new. Here is their information to maybe help you get ahold of them and see what could be done… 800-716-1545 or email at info@pondarmor.com and their website is https://www.pondarmor.com I wish you the best of luck and am sorry you had any issues.
Leena
Hi Lisa
I love your post
Can I call you to ask for more information about epoxy floor?
Lisa Scott
Hello – I am so sorry. I cannot give out my phone number. But if you go to the website for the product, they can help you way more than I can. (wink) Here is a link to their instructions. https://www.pondarmor.com/instructions/
Kim Brown
I am going to be using this on my new coop. Thanks for the fantastic info! Question. Do you need to wait until consistent warmer temps to apply this? Dry weather? It is still cold and rainy in Northern Michigan but want to get this done ASAP.
Lisa Scott
I do know the humidity can change the drying time. I would look on their website to get better details on your situation. Here is the link to their instructions that talks about the humidity. https://www.pondarmor.com/instructions/ I hope that helps. I would love to see your end results.
Chanel
Hi Lisa,
Thank you for sharing this. I am planning on using this on my coop.
I have 3 questions please.
• Did you sand the inside of your coop with 60grit first? (Mine will be constructed of plywood and 2×4 pine)
• Did you add alcohol to your mix?
• Do you know if you could apply wallpaper to it?
Lisa Scott
Hello Chanel, I am so sorry to take so long responding.
• I did not sand my coop. If it would have been super bumpy I would have just it smoother so there would be no bumps sticking up. Luckily my plywood and 2x4s were fairly smooth. They were not perfect – there were just no major splintering type things sticking up.
• I did not use the alcohol. I worked mixing small batches in solo type cups. It was nice and easy to roll on. I didn’t have coverage issues and it didn’t try drying on me super fast. I live in the south though and it is humid. So all these things can change things.
• I love that you are wanting to do wallpaper! So I would think you could if you prep it right. Now I don’t find anything that talks about wallpaper but their website has information on prepping for paint. I would think if paint can stick to it, so can a glue. Here is the link to the website for some extra tips. https://www.pondarmor.com/ When you get done I would love to see your coop!
Cate
Did you get your entire coop done with one “set”‘of this? Also, you mentioned using sand with the final coat- what type of sand?
Cate
Did you get your entire coop done with one “set”‘of this? Also, you mentioned using sand with the final coat- what type of sand?
Lisa Scott
I used 2 sets. And construction sand from a box store like Home Depot or Lowes would work.